
Home Maintenance Tips for Beginners Essential Guide to Easy Upkeep and Repairs

Keeping your home in good condition doesn’t have to be complicated or overwhelming. Simple, regular maintenance tasks can prevent costly repairs and extend the life of your home’s systems and structure. Understanding what to focus on and when will make homeownership less stressful.

This guide offers straightforward tips tailored for beginners, breaking down essential chores into manageable steps. By following practical advice, anyone can build confidence in maintaining their living space effectively.

Getting Started with Home Maintenance

Starting home maintenance requires knowing what tools to have, how often to perform tasks, and organizing those tasks effectively. Efficiency and preparedness depend on having the right resources and a clear plan.

Essential Tools for Beginners

Basic tools cover most common home repairs and upkeep. Essential items include a hammer, screwdrivers (both flathead and Phillips), an adjustable wrench, pliers, a tape measure, and a cordless drill.

A flashlight and a utility knife are helpful for smaller tasks and emergencies. Investing in a good set of tools ensures you can quickly handle most minor fixes without additional expenses.

Quality matters, but beginners don’t need the most expensive equipment. Focus on durability and comfort to make use easier and safer.

Understanding Maintenance Schedules

Certain home systems and components need checks and care on a regular basis. For example, HVAC filters should be replaced every 1-3 months, while gutters require cleaning twice a year to prevent blockages.

Seasonal tasks like inspecting roof shingles in fall or testing smoke detectors monthly help avoid major problems. Water heater tanks should be drained yearly to reduce sediment buildup.

Create realistic frequency plans based on manufacturer recommendations, climate, and home age. Consistency in following schedules prevents costly repairs down the line.

Creating a Maintenance Checklist

A checklist simplifies tracking all tasks and their deadlines. Use a table or app to list items, frequency, last completed dates, and notes on any issues found.

Example:

Task Frequency Last Completed Notes
Change HVAC filter Every 2 months Jan 15, 2026 Replace with HEPA filter
Clean gutters Twice a year Oct 10, 2025 Check for leaks
Test smoke alarms Monthly Jan 1, 2026 Replace batteries yearly

Breaking larger jobs into smaller steps reduces overwhelm and helps maintain progress. Keeping this list visible and updated supports long-term home care.

Safety Basics for Homeowners

Maintaining a safe environment involves wearing the right gear, handling equipment correctly, and managing electricity cautiously. Each of these factors reduces the risk of injury and damage when performing tasks around the house.

Personal Protective Equipment

Always wear appropriate personal protective equipment (PPE) to shield yourself from hazards. Gloves protect hands from cuts, chemicals, and splinters. Safety goggles or glasses prevent debris and dust from damaging your eyes.

Hearing protection, such as earplugs or earmuffs, is vital when using loud power tools. Respirators or masks are necessary if you handle dust, paint fumes, or chemical cleaners.

Proper footwear is important too. Sturdy, closed-toe shoes with non-slip soles reduce the chance of slips and provide support when lifting or climbing. Always check that your PPE fits well and is in good condition before starting any job.

Safe Use of Ladders and Tools

Inspect ladders for dents, cracks, or loose parts before use. Place ladders on a flat, stable surface and never overreach while standing on one. Keep your body centered between the rails to avoid tipping.

Use tools only for their intended purpose. Maintain blades, bits, and cutting edges sharp and clean to prevent accidents caused by slipping or binding. Store tools properly when not in use to avoid trips and falls.

Keep power cords and hoses away from walkways or work areas. Disconnect tools when changing attachments or performing maintenance. Always follow the manufacturer’s safety instructions and guidelines.

Electrical Safety Tips

Turn off power at the circuit breaker before working on electrical fixtures. Use a voltage tester to confirm no current is present. Avoid working on electrical systems in wet or damp conditions.

Do not overload outlets or extension cords. Use the correct wattage for bulbs and appliances. Replace damaged cords immediately and never attempt DIY repairs on wiring unless you are qualified.

Install ground-fault circuit interrupters (GFCIs) in areas near water, such as kitchens and bathrooms. This helps prevent electrical shocks. Regularly check smoke detectors and replace batteries every six months to ensure functioning safety tools.

Routine Cleaning and Upkeep

Regular attention to key areas in the home helps prevent the buildup of dirt and wear. Focusing on spots with frequent use, surfaces prone to accumulating dust, and transparent elements improves both hygiene and appearance.

Cleaning High-Traffic Areas

High-traffic zones such as entryways, hallways, and kitchens accumulate dirt and grime rapidly. Sweep or vacuum these areas daily to remove dust and debris, reducing wear on floors. Use a mop with a mild detergent weekly to clean deeper stains and sanitize surfaces.

Pay attention to door handles, light switches, and countertops. These frequently touched spots can harbor germs. Wipe them down daily with disinfectant wipes or a solution of water and vinegar.

Placing doormats both outside and inside entrances helps trap dirt and minimize dirt tracked into the home, making cleaning easier in the long run.

Maintaining Floors and Carpets

Floors require regular care suited to their material. Hardwood should be swept daily and cleaned with a damp mop weekly. Avoid excess water, which can damage wood.

Carpets need vacuuming at least twice a week, especially in busy rooms. Immediate spot cleaning of spills prevents stains. Use carpet-specific detergents for deeper cleaning every few months.

For tiled floors, sweep and mop regularly with a pH-neutral cleaner to keep grout lines free of dirt buildup. Protect floors by using furniture pads to prevent scratches.

Window and Glass Care

Windows and glass surfaces enhance natural light but collect dust and fingerprints. Clean them at least monthly to maintain clarity.

Use a glass cleaner or a mixture of water and vinegar for streak-free results. Wipe with a microfiber cloth or squeegee, working from top to bottom.

Don’t forget window sills and tracks; vacuum or wipe these areas to remove dirt and prevent mold or pest buildup. Regular care ensures better light and prolongs window life.

Maintaining Key Home Systems

Regular attention to essential home systems helps prevent costly repairs and keeps everything running efficiently. Simple actions like cleaning filters, checking for leaks, and inspecting wiring can extend the life of your equipment and improve safety.

Heating and Cooling System Maintenance

Start by replacing or cleaning HVAC filters every 1-3 months to maintain airflow and reduce strain on the system. Dirty filters decrease efficiency and can lead to system breakdowns. Schedule annual professional inspections to check refrigerant levels, clean coils, and ensure thermostat accuracy.

Keep vents and registers clear of obstructions for proper air circulation. In winter, check for drafts around windows and doors that could affect heating performance. For systems with outdoor units, remove debris and vegetation to prevent overheating.

Plumbing Checks and Prevention

Regularly inspect visible pipes for signs of leaks, corrosion, or water stains. Tighten loose fittings and replace worn-out washers to avoid drips. Know the location of your main water shutoff valve in case of emergency.

Prevent clogged drains by avoiding grease or large food particles down sinks. Use drain strainers and periodically flush drains with hot water or baking soda and vinegar. Inspect under sinks and around toilets for moisture, which may indicate hidden leaks.

Electrical System Inspections

Examine outlets and switches for signs of wear, discoloration, or unusual heat. Replace damaged cords and avoid overloading circuits with too many devices. Test smoke and carbon monoxide detectors monthly and replace batteries annually.

Hire a licensed electrician for any wiring issues or if you notice flickering lights or frequently tripped breakers. Label your circuit breaker panel clearly; this will speed up troubleshooting during electrical problems.

Task Frequency Tools/Notes
Filter replacement (HVAC) Every 1-3 months Vacuum or new filters
Leak inspection (plumbing) Monthly Flashlight, wrench
Electrical outlet check Quarterly Visual inspection
Smoke alarm test Monthly Battery, test button

Seasonal Maintenance Tasks

Regular upkeep varies throughout the year and targets different parts of your home. Certain tasks focus on preventing damage from weather changes, while others improve comfort and efficiency.

Spring and Summer Chores

Spring is ideal for checking your roof and gutters. Clear debris from gutters to prevent water buildup and inspect for loose shingles or damage after winter.

Lawn care steps include aerating the soil and applying fertilizer to revive grass. Seal cracks in driveways and patios to avoid weed growth.

Summer is best for servicing air conditioning units. Clean or replace filters routinely and check for refrigerant leaks to maintain cooling efficiency. Also, inspect window and door seals to reduce heat loss and lower energy bills.

Fall and Winter Preparations

In fall, focus on sealing drafts. Add weather stripping to doors and windows to keep heat inside. Check your heating system early by replacing filters and scheduling professional maintenance.

Clear leaves and debris from drainage areas to reduce the risk of water damage when it rains. Also, drain and store garden hoses to protect them from freezing.

Winter preparations include insulating pipes to prevent freezing bursts. Test smoke and carbon monoxide detectors, as heater use increases risk. Remove snow and ice safely to protect walkways and prevent accidents.

Exterior Upkeep Tips

Maintaining the exterior of your home prevents costly repairs and keeps your property looking its best. Regular attention to key areas protects your home from weather damage and extends its lifespan.

Roof and Gutter Inspection

Check your roof every six months for missing or damaged shingles. Look for signs of curling, cracking, or moss growth, which can lead to leaks. Pay close attention after storms.

Gutters should be cleaned at least twice a year. Remove leaves, twigs, and debris to prevent water backups that can damage siding or foundations. Ensure downspouts direct water at least 3 to 4 feet away from your home.

Use a sturdy ladder and wear protective gear. If you’re uncomfortable with heights, consider hiring a professional for detailed inspections or repairs.

Yard and Landscape Care

Trim trees and shrubs so branches don’t touch your home. This prevents damage and reduces pest access points. Keep grass and plants at least 6 inches away from the foundation to avoid moisture buildup.

Regularly rake leaves and clear garden beds to prevent mold or insect infestation. Mulching helps retain soil moisture but should not be piled against the siding.

Inspect irrigation systems for leaks or overspray on the house. Proper watering prevents foundation erosion and wood rot.

Exterior Paint and Siding Maintenance

Inspect siding for cracks, warping, or loose panels. Repair or replace damaged sections promptly to protect against moisture intrusion.

Paint should be checked every few years for peeling, chipping, or fading. Repaint areas where the old paint has failed to seal the surface. Use high-quality, weather-resistant exterior paint suitable for your siding material.

Clean siding annually with a mild detergent and a soft brush or low-pressure washer. Avoid harsh chemicals that may cause damage.

Troubleshooting Common Issues

Homeowners often face small problems that can be fixed quickly with the right approach and tools. Focusing on minor leaks, drafts, and simple appliance repairs can save money and prevent further damage.

Fixing Minor Leaks

Identify the source of leaks by inspecting pipes, faucets, and fixtures. Common causes include worn-out washers, loose connections, or cracked seals.

To fix a dripping faucet:

  • Turn off the water supply
  • Disassemble the faucet handle
  • Replace washers or O-rings
  • Reassemble and test

For leaking pipes, use pipe sealant tape or replace damaged sections. Always ensure the main water valve is off before attempting repairs to avoid flooding.

Addressing Drafts and Insulation Gaps

Check windows, doors, and attic spaces for cold spots or drafts using your hand or a candle flame. Seal gaps using weatherstripping, caulking, or foam sealant.

Key materials to use:

Gap Location Recommended Sealant
Window frames Weatherstripping, caulk
Door bottom Door sweeps, weatherstripping
Attic and crawlspaces Expanding foam, caulk

Proper sealing improves energy efficiency and comfort without heavy remodeling.

Simple Appliance Repairs

Start by unplugging the appliance before inspection. Common repairs include cleaning filters, replacing belts, or tightening loose parts.

For example, a noisy dishwasher often needs a cleaned filter or a lubricated pump. If a washing machine fails to drain, check the drainage hose for clogs.

Keep a basic toolkit and user manual handy for reference. Regular maintenance extends appliance life and reduces repair needs.

When to Call a Professional

Some home repairs require skills and tools that beginners may not have. If a task involves complex wiring, plumbing, or structural work, it’s safer to hire a professional.

Electrical issues, such as frequent breakers tripping or exposed wiring, should always be handled by a licensed electrician. Mistakes here can cause fires or serious injury.

Plumbing problems like persistent leaks, pipe bursts, or sewer backups also need expert attention. DIY fixes may only provide a temporary solution and lead to further damage.

Consider calling a professional if the repair involves:

Issue Reason to Call a Professional
Electrical wiring Safety risk and requires licensed certification
Major plumbing repairs Prevent water damage and mold growth
Structural damage Ensures stability and complies with building codes
HVAC system repairs Requires specialized tools and knowledge

Simple maintenance like changing filters, tightening screws, or cleaning gutters can usually be done safely at home. But for anything beyond basic upkeep, experts are the best choice.

Professional services may cost more upfront but reduce risks and future expenses caused by improper repairs. It also ensures that the work meets local codes and standards.

Building Good Maintenance Habits

Creating a routine is key to effective home maintenance. Set aside time weekly or monthly for specific tasks. Consistency prevents small problems from growing.

Use reminders or a calendar to track chores. Digital tools or printed checklists can help keep tasks organized. This reduces the risk of forgetting important upkeep.

Focus on simple, manageable actions. For example:

Task Frequency Notes
Check smoke alarms Monthly Replace batteries yearly
Clean gutters Twice a year Spring and fall recommended
Inspect plumbing Quarterly Look for leaks or drips

Breaking tasks into smaller steps makes them less overwhelming. Tackle one area at a time instead of trying to fix everything at once.

Involve household members in maintenance. Assign clear responsibilities to share the workload. This builds a collective sense of care for the home.

Reward yourself for completing chores. Positive reinforcement helps maintain motivation. Over time, these habits become routine and effortless.

How to Use Exposed Structural Beams to Create Striking Modern Interior Spaces

How to Use Exposed Structural Beams to Create Striking Modern Interior Spaces

Ceilings in most modern houses are an afterthought – a flat, white nothing you paint and only notice when you’re lying on the floor. It doesn’t have to be this way. The ceiling is the biggest uninterrupted surface in most rooms, and when you make it solid timber rather than something hidden behind plasterboard, it becomes the most powerful design element in your house.

Structural beams versus decorative timber – know the difference first

There is a substantial difference between beams supporting the roof and other beams that are glued or nailed on after construction just to provide that appearance. Post-and-beam construction is what is truly responsible for bearing exposed beams. The structural design logic behind this is completely different from decorative beams, but it is what delivers the drama that everybody is looking for.

With true post-and-beam construction, an engineer has already figured out the load paths, span limits, and connection points. The placement isn’t arbitrary: it’s wherever the structure needs the load to be concentrated. If this sounds like a lot less fun, it is. But it’s also why that finished ceiling looks so good. A beam that’s bearing real load reads differently to the eye than one that’s not. Even one that’s been hollowed out looks different to your eye, and people can tell; they just can’t tell you why. It has proportion, depth, and a connection detail at each end that reads as properly resolved rather than decorative.

If you are working with an architect or builder on a new build or a major reno, this is the first conversation to have: are we designing the structure to be seen, or are we adding a look on top of a structure that was never intended to be part of the interior? It changes almost every decision that follows.

Why engineered timber has replaced solid beams for long spans

In the old days, farmhouses used solid timber beams because that’s what was available. Solid timber still looks fantastic, but it moves – it shrinks, twists, and can sag over a long span as it dries out and settles. In a modern open-plan living area where you might need a clear run of six or eight metres with no support column in the middle, that unpredictability is a problem.

Enter glued laminated timber, or glulam. It’s made of layers of timber bonded under pressure, and the lamination process cancels out most of the defects and movement you’d get from a single solid section. You get a beam that’s straighter, stronger for its size, and far more predictable over a long span. Laminated veneer lumber or LVL does a similar job using much thinner veneer layers rather than full boards, and it’s a common alternative for beams and lintels where a slightly different profile or cost point suits the project better.

Both products are produced in a factory to consistent engineering specs, which in turn means your structural engineer can calculate exactly how a given section will perform before it’s ever even been installed. That’s the opposite of guesswork and it’s why almost every architecturally driven exposed-beam ceiling you see in current residential design is built on engineered timber rather than reclaimed or rough-sawn solid stock.

For Perth homeowners, who makes the stuff matters as much as the spec. Local climate, transport distances, and bushfire attack level requirements all influence which sections and finishes actually make sense for a given site, so it’s worth getting Laminated Beams Perth advice from a supplier who deals with local architects and builders rather than ordering a generic beam off a national catalogue. A supplier who knows the regional building requirements can steer you towards the right species, span rating, and finish before your engineer has even finalised drawings.

Let the beams follow the roofline, not fight it

A flat ceiling with beams bolted across appears like a shrug. One that rises to a ridge, or angles with the rafters, makes the room feel like a volume rather than a box with a lid on top. That’s the vaulted ceiling effect, and it’s one of the easiest ways to make a reasonably sized room feel a whole lot bigger without touching a wall.

It doesn’t take large, over-scaled beams to do this. Just the act of tracking the slope while it rises to a ridge beam gives an impression of vertical gain and pulls the eye upward. And it gives the room a feeling of height it didn’t have when the ceiling was simply a flat plane six centimetres above the door frame. It’s one of the few structural moves that adds a feeling of scale to the room without adding a single square metre of floor area.

Spacing and rhythm decide whether it looks designed or accidental

Many exposed-beam ceilings lose their appeal because the beams are not spaced in a visually pleasant way. When beams are installed purely to meet structural load requirements without taking the room’s dimensions into account, the result can look haphazard. It’s better if the beams are spaced in proportion to the room’s width, generally between 1.5 and 2.5 metres apart.

The aesthetic distance between them is equally as important as the distance the beams can span without becoming overwhelmingly large. It’s easier to appreciate a room with even, rhythmic spacings. When the beams are spaced at odd intervals, the structure often looks disjointed. It is recommended to have these discussions about spacing at the beginning of the design process. In some cases, increasing the beam depth allows wider spacing while keeping the same span capacity.

Treat the ceiling as the fifth wall

Designers often refer to the “fifth wall” for a good reason – in a house that’s all one big open-plan space, the ceiling is the only surface that stretches uninterrupted across the kitchen, living, and dining areas. Everything else is sliced up by furniture, benchtops, or half-walls. But the ceiling isn’t.

So it’s the obvious place to establish zones when you don’t want to actually separate them. A different beam direction, a slightly different spacing pattern, or a slab of ceiling that steps down over the dining table can subtly nudge one zone into another while the floor plan stays wide open. It’s a subtler tool than a change in flooring material, but it works because people respond to overhead cues more than they might think.

Route your services through the structure instead of around it

All open-plan ceilings need lighting, speaker wiring, and often ducted air returns to function properly. Typically, all of this is hidden above a flat plasterboard ceiling with the hope that it’s never seen again. With an exposed-beam ceiling, there’s an opportunity for this infrastructure to enhance the design rather than form a hidden, imperfect layer over your head.

For example, LED strip lighting hidden in a recess below a beam gives you clean, shadow-free lighting with not a single visible fitting in sight. Pendant wiring can be run down the hollow of a beam rather than hanging off a ceiling rose. Ducted return air grilles can be placed in the bay between beams so they form part of the rhythm of the ceiling pattern rather than an afterthought punched through some drywall. None of this is difficult to do, but it all has to be designed before the beams go up.

Match the timber to the rest of the room – or don’t, deliberately

The type of tree you choose modifies the aesthetic appearance of the ceiling as a whole. Choose radiata pine and the result is a light, blond ceiling that contributes to a Scandi-cool, warm minimalist vibe when part of an unadorned warm and cozy theme. Spotted gum or blackbutt amplify the reds and browns and bring those alluring grain lines forward a bit. The rich, traditional aesthetic of that look will whisper old money to fans of grand heritage style. Douglas fir is a happy medium with a straighter, finer grain, making it a favourite for designers who like a cleaner, crisper architectural edge to their exposed beams.

You can either run with that and match your ceiling to your flooring, turning the whole room into an elegant symphony of a single timber. Or you can amp up the contrast, pitting the paleness of the wood against a darker floor, or the warmth against a cold palette of white walls and steel fixtures, so that the ceiling makes a dramatic statement all on its own. Both options work! What doesn’t is haplessly picking a timber species and not giving any thought to the way it works with the other colours because then it just looks like you forgot to pick the ceiling beam.

Weigh timber against steel honestly

Steel beams can span larger distances with a shallower profile, and in certain structural circumstances, they’re just the better engineering response. Still, the negative trade-offs of steel are well documented. It’s heavier to get on-site, plus it efficiently conducts both heat and cold in a way timber doesn’t. Aesthetically, steel reads as cold and industrial unless that’s the expressly desired style.

Timber, particularly engineered sections, surrenders a small portion of span capacity in exchange for a warmer aesthetic, easier on-site handling, and a material that also contributes acoustically to the room. Timber surfaces scatter sound rather than reflecting it directly back the way a hard, smooth ceiling does. In a large open-plan volume, that difference can be felt in the absence of the slap echo, which is the uncomfortable feeling of echo in the space. There’s also a wellbeing case for timber that goes beyond looks. A widely cited study from the University of British Columbia and FPInnovations found that occupants in a room with visible wood surfaces showed heart rates roughly 20 percent lower than those in a room with none, with similar effects on stress-related cortisol levels. That’s a meaningful data point for anyone weighing a warm, biophilic material choice against a purely structural one.

Plan for prefabrication, compliance, and comfort

Engineered beams are usually pre-cut and pre-drilled off-site to exact engineering specifications, which cuts installation time and waste on site considerably compared with cutting solid timber to fit. That’s a real practical benefit for builders working to a tight schedule, and it’s worth asking your supplier early about lead times for fabrication.

Compliance also needs to be sorted before design, not during construction. The National Construction Code and bushfire attack level ratings both affect what exposed timber options are viable, particularly in Perth’s fringe suburbs where BAL ratings can be high. Compliant timber options exist even in higher-risk zones, but they need to be selected and detailed at the planning stage, not swapped in halfway through a build when the framing is already up.

Finally, think about what sits above the beams. Exposed timber on the underside of a roof often needs additional insulation to manage heat gain in summer and reduce rain noise, sometimes through a hybrid soffit build-up that keeps the timber visible from below while doing the thermal work out of sight. Get this detail wrong and you’ll have a beautiful ceiling in a room that’s too hot in January and too loud every time it rains.

A ceiling built this way isn’t decoration bolted onto a finished house. It’s structure doing double duty – holding the roof up and giving the room its character at the same time. Get the engineering, spacing, and species right at the design stage, and the ceiling stops being the thing you forgot to think about and becomes the reason people look up when they walk in.

How to Organize Home Office Space for Maximum Productivity and Efficiency

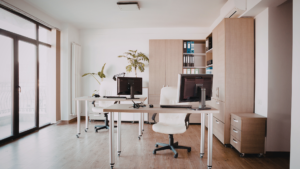
Organizing a home office space starts with identifying what you need to work efficiently and removing any clutter that doesn’t serve a purpose. Create designated zones for different tasks and keep essential items within easy reach to maintain focus and productivity.

Maximizing storage and using vertical space helps keep surfaces clear and your workspace inviting. With the right setup, your home office can support both comfort and efficiency throughout your workday.

Assessing Your Home Office Needs

Determining the right setup starts with understanding what your work requires, the tools you need, and how you prefer to function in your space. Each aspect shapes the effectiveness and comfort of your home office.

Evaluating Work Requirements

First, consider the nature of your job. Do you primarily write, attend virtual meetings, or manage physical paperwork? Different tasks demand specific arrangements. For example, video calls require a quiet area with good lighting, while creative work might need more open space for materials.

Think about how often you need to use the space. If you work full-time at home, invest in ergonomic furniture and multiple monitors. Part-time users might opt for a smaller desk and basic equipment to save space.

Keep in mind the need for storage. Jobs involving many documents or tools require filing cabinets or shelves. Clear priorities in work tasks drive practical layout decisions.

Identifying Required Equipment

List the devices and materials essential to your daily work. This could include a computer, printer, external drives, or special tools. Make sure your office has enough outlets or a power strip to accommodate everything safely.

Consider technology needs like high-speed internet or backup power if your work is sensitive to outages. Also, plan space for accessories such as chargers, headphones, or reference books.

A well-organized setup allows easy access to frequently used items, reducing clutter. Prioritizing equipment prevents overspending on unnecessary gadgets and streamlines the workspace.

Understanding Personal Preferences

Your comfort and habits play a significant role in productivity. Identify whether you prefer natural or artificial lighting, standing desks or traditional seating, and minimal or detailed décor. These preferences influence your mood and efficiency.

Noise sensitivity is another factor. If you need silence, soundproofing, or noise-canceling headphones are important. Some people thrive in vibrant spaces with color, while others work best in neutral tones.

Adjust the layout to match your daily flow, such as placing common items within arm’s reach. Personalizing your office supports longer focus periods and reduces fatigue.

Choosing the Ideal Location

Selecting the right spot for a home office impacts productivity and comfort. Factors such as light exposure, sound levels, and use of available space play crucial roles in creating an efficient workspace.

Maximizing Natural Light

Natural light helps reduce eye strain and boosts alertness. Choose a location near windows facing north or east for consistent, indirect sunlight throughout the day.

Avoid glare on computer screens by placing your desk perpendicular to windows. Use light-colored curtains or blinds to control intensity without blocking light entirely.

If natural light is limited, supplement it with adjustable LED task lighting. Position light sources to minimize shadows and enhance visibility of work materials.

Considering Noise Levels

A quiet environment is essential for concentration. Pick a room or corner away from common household noise like kitchens, TVs, or heavy foot traffic.

Evaluate sound distractions at different times of day. A location with thick walls or carpeted floors will absorb noise better.

If complete silence isn’t possible, consider using noise-canceling headphones or white noise machines to maintain focus.

Utilizing Available Space

Optimize space by selecting an area that fits office furniture without crowding. Measure your desk, chair, and storage needs before finalizing the spot.

Corners can make efficient use of otherwise unused space. Keep frequently used items within arm’s reach to reduce unnecessary movement.

Ensure the location allows for proper ventilation and easy access to power outlets. Avoid blocking walkways or other functional areas of your home.

Designing an Efficient Layout

An effective home office layout maximizes space functionality and supports productivity. Key factors include where to position your desk, how to separate different work activities, and ensuring smooth movement between tasks. Thoughtful design helps reduce distractions and improve comfort.

Optimizing Desk Placement

Place your desk where natural light is available, preferably near a window but not directly facing it to avoid glare on screens. Positioning the desk to face the room or a solid wall can minimize distractions, depending on personal preference.

Keep frequently used items within arm’s reach to reduce unnecessary movement. If possible, leave clear space behind your chair for easy access and quick repositioning. Desk placement should also consider power outlets for electronics to prevent cluttered cords.

Creating Activity Zones

Divide your office space into distinct zones based on task types, such as a computer work area, a paperwork zone, and a storage section. Use shelves, filing cabinets, or even room dividers to visually separate these zones.

This separation helps mentally switch between tasks and keeps clutter confined. For example, keep creative or sketching supplies in one corner and digital work tools in another. Clearly defined zones improve organization and efficiency.

Ensuring Proper Workflow

Arrange furniture and equipment to support a natural sequence of activities. For instance, place the printer near the desk but not in the primary working area to avoid crowding. Keep the trash bin and filing system within easy reach without interrupting movement.

Review your typical work routine and map out the flow from task to task. Avoid obstacles or tight spaces that slow progress. A smooth workflow reduces wasted time and physical strain during the workday.

Selecting Storage Solutions

Effective storage solutions maximize available space and improve productivity. Prioritizing functionality and accessibility helps maintain a clutter-free environment. Consider the size, style, and placement of storage to suit specific work needs.

Incorporating Shelving Units

Shelving units provide vertical storage, making them ideal for small home offices. Open shelves keep frequently used items visible and within reach, reducing time spent searching.

When choosing shelves, focus on sturdy materials like metal or solid wood to support heavy books or equipment. Adjustable shelves add flexibility for changing storage demands.

Wall-mounted shelves save floor space and can be installed above desks. Use baskets or boxes on shelves to organize smaller items and avoid clutter.

Using Filing Cabinets Effectively

Filing cabinets secure and organize important documents. Opt for cabinets with smooth-glide drawers and label holders to streamline access.

Sort files into categories and color-code folders for quick visual identification. Store active files in the top drawers and archive older papers below.

Consider fire-resistant cabinets if the protection of sensitive information is necessary. Slim, vertical filing units fit into tight spaces without overwhelming the office layout.

Choosing Mobile Storage Options

Mobile storage units offer versatility by combining storage with mobility. Rolling carts and cabinets can be repositioned to suit your workflow.

Look for models with locking wheels to ensure stability when stationary. Mobile storage works well for storing office supplies, tech accessories, or printing paper.

Compact designs fit under desks or in corners, making them ideal for small rooms. Select units with multiple compartments or drawers to keep items organized during transport.

Organizing Technology and Cables

Properly organizing technology and cables reduces clutter and improves workspace efficiency. Arranging devices thoughtfully boosts accessibility and prevents damage. Creating dedicated areas for charging keeps everything powered without chaos.

Managing Cable Clutter

Start by untangling all cables and identifying each one with labels or colored tags. Use cable organizers such as clips, sleeves, or velcro straps to group wires by device or function.

Secure cables along desks or walls with adhesive hooks or raceways to keep them out of reach but accessible. Avoid excess cable length on the floor to prevent tripping hazards and wear on cords.

Avoid mixing power and data cables to reduce interference. Regularly check cables for damage and replace frayed wires promptly to maintain safety.

Positioning Electronic Devices

Place frequently used devices like monitors, printers, and external drives within arm’s reach to enhance workflow. Position monitors at eye level and about an arm’s length away to reduce strain.

Arrange devices to minimize cable crossings and tangles, creating a cleaner desk surface. Leave space around electronics to improve air circulation and prevent overheating.

Keep backup drives and rarely used gadgets in drawers or storage containers to reduce desktop clutter.

Implementing Charging Stations

Designate a specific area for charging multiple devices, using a multi-port charger or charging dock. This centralizes power needs and prevents tangled cords all over the desk.

Label charging cables and assign slots based on device type or owner if sharing the space. Use stands or holders to keep phones and tablets upright while charging.

Regularly clear the station of finished or unused chargers to maintain an organized and functional zone.

Decluttering and Minimizing Distractions

A clean, organized workspace supports focus and efficiency. Removing unnecessary objects and setting up clear storage strategies reduces visual clutter and interruptions. Maintaining cleanliness further enhances productivity and keeps distractions to a minimum.

Sorting and Purging Unnecessary Items

Begin by categorizing all items on and around your desk into three groups: keep, donate/sell, and discard. Focus on essentials related to your daily work tasks.

Limit paperwork to what you actively need, such as current projects, bills, or important documents. Digitize notes and receipts when possible to reduce physical clutter.

Be honest about the tools and supplies you rarely use. Removing these frees space for functional items and improves your mental clarity. Use labeled boxes or bins for temporary storage during the sorting process.

Establishing Organizational Systems

Adopt storage solutions that fit your workflow, like filing cabinets for documents and drawer organizers for supplies. Use vertical space with shelves or wall-mounted bins to keep your desk surface clear.

Implement a consistent labeling system using clear tags or color codes. This facilitates quick retrieval and return of items without hesitation.

Create designated zones for different activities—computer work, writing, reading—to streamline transitions. Review and adjust storage periodically to prevent new clutter buildup.

Creating a Clean Work Environment

Regular cleaning is critical. Schedule a weekly routine to dust surfaces, wipe down electronics, and organize loose items. Use microfiber cloths and appropriate cleaning sprays to protect devices.

Minimize distractions by managing cables with clips or sleeves to avoid tangles. Position your desk away from high-traffic areas or noisy spots if possible.

Keep personal items limited to one or two meaningful objects to avoid visual overcrowding. A tidy, distraction-free space supports sustained concentration and work satisfaction.

Personalizing Your Workspace

Creating a workspace that reflects your style and preferences can boost comfort and focus. Thoughtfully chosen items help maintain motivation and reduce stress during work hours.

Incorporating Inspiring Decor

Select decor that motivates or calms you, such as framed quotes, artwork, or photos. Opt for pieces that resonate with your work goals or values.

Keep decor minimal to avoid clutter. Use a small bulletin board or calendar for functional decoration.

Consider color psychology: blue can enhance focus, while green reduces eye strain. Choose colors that support your productivity.

Use shelves or wall-mounted organizers to display inspiring objects without sacrificing desk space.

Adding Plants and Personal Touches

Plants improve air quality and create a calm environment. Choose low-maintenance options like succulents or snake plants.

Place plants where they receive natural light, such as near a window. Use small pots to avoid overcrowding the space.

Add personal items like a favorite mug, a meaningful trinket, or a cozy blanket. These increase comfort and make the workspace uniquely yours.

Avoid excessive personalization, which can distract. Limit to 3-5 personal objects to balance focus and individuality.

Establishing Maintenance Habits

Maintaining a well-organized home office requires consistent effort and planned actions. Routine tasks, periodic tool upgrades, and effectiveness reviews are key to preventing clutter and optimizing productivity over time.

Scheduling Regular Cleanups

Create a cleanup schedule that fits your workflow, such as a weekly 15-minute session or a monthly deep clean. Stick to it by blocking time on your calendar to avoid skipping.

During cleanups, clear surfaces, shred unnecessary papers, and tidy digital files. Use checklists to ensure no tasks are missed. Involve all areas: desk, shelves, cables, and drawers.

Set reminders and treat these sessions as non-negotiable appointments. This habit prevents buildup and keeps your space consistently functional.

Updating Organizational Tools

Regularly assess whether your current storage solutions meet your needs. Replace worn-out folders, boxes, or drawer organizers to maintain efficiency.

Consider new tools like cable management clips or adjustable shelving if your workflow changes. Digital tools like task managers or cloud storage should also be reviewed and updated.

Maintain a log of supplies, so you know what needs replenishing. This proactive approach avoids last-minute searches and supports a smooth working environment.

Reviewing Office Efficiency

Schedule quarterly reviews of your workspace setup. Evaluate if the layout supports your tasks and if any adjustments are needed for comfort or accessibility.

Use a simple rating system for areas like lighting, seating, and equipment placement. Note what works and what hinders productivity.

Gather feedback if others share the space. Small changes based on these insights can lead to better focus and reduced downtime.

Adapting to Changing Needs

Home office requirements rarely stay the same. Tasks, technology, and work styles evolve, so your workspace should adapt accordingly.

Start by choosing flexible furniture, like adjustable desks and modular storage. These allow easy reconfiguration as your work demands shift.

Keep clutter minimal to quickly repurpose your space when needed. Regularly assess what tools and materials are essential.

Use a simple system to track changes in your workflow:

Aspect Current Needs Potential Change
Equipment Laptop, printer, headphones Additional monitor, drawing tablet
Storage Filing cabinet, shelves More digital storage, fewer papers
Seating Ergonomic chair Alternative seating for meetings

Technology upgrades can impact space use. New devices or software might reduce physical materials or require new cable management.

Be open to changing your setup once every few months. This keeps your environment aligned with evolving priorities without overwhelming effort.

Prioritize multipurpose items. For example, storage boxes that double as seating or desks with built-in charging stations.

Adaptability in your home office creates a sustainable, functional space that meets current and future work needs.

Dual Diagnosis: Understanding the Connection Between Mental Health and Addiction

Dual Diagnosis: Understanding the Connection Between Mental Health and Addiction

Mental illness and addiction often co-occur. This is not a coincidence; there are underlying mechanisms that explain these observations. For example, stress, trauma, and genetic vulnerabilities are risk factors for both mental illness and addiction. Co-occurring mental illness and addiction can be more damaging and harder to treat than each condition on its own.

The Bi-Directional Loop Nobody Warned You About

Health care providers often treat these issues separately, but those of us who live with them know we must look for a solution that addresses both. It is not a chicken or the egg argument. We do not ask ourselves or each other where it all began. Was I fundamentally flawed in a way that invited the depression or the addiction? No, that doesn’t come until much later. For years, we simply live with the clawing discomfort of a brain taking a nosedive and the reckless coping mechanisms we use to make it stop.

Self-Medication is Rational, Until it Isn’t

The self-medication hypothesis is often misinterpreted as a justification. That’s not the case. It is an explanation of how untreated psychological suffering functions. Unaddressed trauma does not induce a person to use and then misuse a substance because they are weak-willed. It leads them to a substance because that is what has sequestered the symptoms flooding their consciousness. Memories, flashbacks, the grave fear metastasized in your brain and your body. Alcohol is stunningly effective at calming the symptoms of anxiety, at least in the early stages of drinking. Stimulants can lift the leaden blanket of depression. Opioids blunt physical torment and quell emotional distress.

But these drugs work on and overwhelm and occupy the very same neurotransmitters, the dopamine, the serotonin, the GABA that modulate mood and alleviate anxiety in the first place. What is at first relief becomes need. And need diminishes the very systems in your brain that you goosed these chemicals to fix. By the point countless addicts look for professional help they are no longer trying to control a mental illness. They are attempting to escape the sickness, the up-regulation and down-regulation of autoreceptors, the molding of a brain, overwhelmed and weakened, by molecule.

Shared Vulnerabilities, Not Coincidence

It’s not a coincidence that a lot of people wind up with both. There are shared neurobiological vulnerabilities that make certain individuals more likely to develop both mental illness and substance use disorder. Genes play a role. Brain circuit differences, especially in the reward system, stress system, as well as impulse systems can play a role. So if somebody has a naturally underactive reward system, they might need more stimulation to feel normal, which can put them at risk for both sort of risk-taking behavior and substance use.

Life also stresses this. Early trauma, or even chronic instability, or neglect can change the way that a developing brain regulates stress hormones. That changed baseline makes for a person that’s more reactive to life’s truck and more likely to seek chemical relief when things get hard. None of this is destiny, but it does mean that two people with the same diagnosis, whether bipolar disorder, PTSD, or substance use disorder, can have very different underlying risk profiles depending on what exactly shaped their brain early on.

Integrated Treatment is the Actual Standard Now

The expert view has changed, and it makes strategic sense. Dual-diagnosis or "integrated" treatment makes certain depressing obvious assumptions: a single team (of psychiatrists, addiction specialists, therapists, and case managers) can tackle both conditions at once; you’re in the same place; and you’re using the same treatment plan. We won’t wait for your sobriety to solve your depression. We won’t discharge you from psychiatric care and wish you the best in the addiction program. It’s the same program.

This model works brilliantly because it treats shared symptoms as shared symptoms rather than siphoning them off into separate silos. Insomnia, irritability, and emotional numbness could be prompted by withdrawal, an underlying mood disorder, or both. A team that’s only treating one hole in the roof will misunderstand the rain and miss the driver. An integrated team can spot the full pattern and make live adjustments to treatment. This sort of program doesn’t always come easy, but families looking for best practice should be searching for a dedicated facility like https://legacyhealingnj.com/ where patients receive both care concurrently instead of being bounced between disconnected providers.

Why Siloed Healthcare Keeps Failing These Patients

For many years, the accepted way to approach this was to provide one kind of care after the other. First get someone sober, then treat their mental health. Or, vice versa, stabilize someone’s psychiatric condition, then address their addiction. This is still how some programs are run. But it doesn’t work. The patient sent from detox to their therapist with an unaddressed bipolar diagnosis is unlikely to remain sober for long. Neither is the patient discharged from the psychiatric unit who receives a recommendation for rehab at a treatment center where their bipolar was ignored.

Behavioral health conditions aren’t solved in series. They demand parallel and fully integrated care. Treatment for a patient with both, who more than likely also needs primary care, dental, and other kinds of help, should be delivered by clinicians who understand all of those aspects of their life. If your doctor works only with your substance use problem, aiming to discharge you once you’ve been abstinent for a set period of time, with no regard for the other factors that may be driving your issue, relapse is the most likely outcome. If your therapist only knows how to treat your anxiety disorder, or doesn’t consider your addiction when they diagnose you with codependency, you’re not going to get better.

The Therapies Doing the Real Work

Therapy that’s built on evidence is where it’s plausible to make the most progress, day to day. In practice, this can sometimes be a matter of trial and error to see what works best for a specific person. CBT can help patients identify the thought patterns that are fueling their substance use and their mood symptoms and alter them. Maybe there’s something that seems to predict a depressive spiral, a fight with your partner, a bad day at work, and you can work together to come up with a different response, a better habit than scoring some meth.

DBT can help battle the emotional dysregulation that leads to using, giving you tools to ride out a craving or a spike in anger or sadness without immediately grabbing a drink. EMDR is newer and more controversial but is becoming popular in dual diagnosis rehab for people whose addiction is trauma-based. It’s supposed to help your brain to reprocess memories of traumatic events and not see the same level of physiological activity in response. Most people will use a combination of these treatments, according to what the evidence supports and what seems to work in reality.

Medication Has to be Managed Carefully

Pharmacotherapy within the double diagnosis context can be a tightrope walk. The right antidepressants, mood stabilizers, or anti-anxiety meds can be a lifesaver for someone in fragile psychiatric health, but those medications can also directly or indirectly create or worsen dependency, and contraindications often exist between some of them and the medications used for addiction. Medication-Assisted Treatment, on the other hand, (i.e.- the use of buprenorphine or naltrexone for opioids and/or acamprosate or disulfiram for alcohol) together with counseling, has volumes of solid evidence demonstrating its efficacy, but clinical psychiatric oversight for the patient related to their mood, anxiety, or psychotic disorder while also on these medications for depression, bipolar, or anxiety is obligatory, meaning it’s just too risky to manage the multiple medications in isolation from one another.

This is where our fragmented-siloed system most directly puts lives at risk. If a psychiatrist working without an addiction-specialist partner, shared records, electronic notes, or direct communication makes a mistake, the consequences can be disastrous. We spend a lot of time reading about corrupt doctors who are too willing to risk their medical licenses by overprescribing controlled substances; we don’t spend nearly enough time thinking about all the well-intentioned psychiatrists working in isolation from addiction medicine experts who become unwitting contributors to their communities’ epidemics of drug or alcohol relapse, overdose, and deaths, just by helping the very same patients with their emotional suffering.

Trauma is Usually the Root, Not a Footnote

If someone starts using because they were sexually assaulted by a family member in their home, for example, returning to that home with no better strategy for dealing with the memories than getting high sets the bar for recovery impossibly high. This is where many go wrong in terms of "abstinence-only" beliefs: Survivors of trauma often grew up using because they had no diagnosis, no medication that wouldn’t be stolen, and no safe space except the one they made in the clouds for themselves.

What Families Should Actually Look For in a Provider

Selecting a dual-diagnosis center requires paying no attention to the marketing mess and looking here instead:

1. Licensing and Staffing. First, because you can’t provide good dual-diagnosis care without them, make sure the facility has licensed addiction specialists and licensed mental health clinicians on staff. Not just one or the other with standing orders to refer out to a third party for the specific therapy the staffer isn’t trained to deliver. Ask directly whether psychiatric and addiction care happen under one roof with shared treatment planning, or if you can expect layers of cost and coordination that an impaired patient is an unlikely candidate to navigate effectively.
2. Ask how they diagnose. A lot of what distinguishes good dual-diagnosis care from the rest isn’t in the treatment process, necessarily, but in the lead-up to it, specifically, in laying a solid diagnostic groundwork before a treatment plan is ever finalized. If you’ve ever been through treatment before, you probably have a notion of what the admissions and intake process are usually like: a probably overwhelmed counselor or conveyor belt-nurse asks you a bunch of probably formulaic questions, checks most likely already filled medical history boxes and family history boxes, and mostly they’re probably looking for you to complete the list of drugs you’ve used over the last few years. A lot of information gathering, in other words, but not a lot of real information.

Certainly not enough to build a sophisticated biopsychosocial picture of a patient, even in rough draft. A dual-diagnosis patient in the midst of active addiction is unlikely to be honest, confrontational, or particularly introspective. Especially the first one. So the game is usually one of guessing, based on the little info that can be gathered and the misimpression that the patient might self-diagnose based on a reading of a handful of problems that don’t interest them particularly.

DSM-5 criteria for a thorough psychiatric evaluation, meaning a lot of time spent with a real doctor who knows what to ask and why, isn’t interested in you clarifying what symptoms bother you because they weren’t even listening when you offered your list of symptoms, as their questions are predicated less on getting all the symptoms from you than on getting clues regarding some underlying causes from the way you describe your symptoms. But that’s how certain conditions that get missed in standard addiction-only programs, go undiagnosed ADHD, complex PTSD, and personality disorders that complicate recovery.

Getting sober and getting mentally well were never two separate jobs. Any healthcare provider still treating them that way is asking patients to solve half a problem and hoping the other half sorts itself out. It rarely does. The providers getting this right are the ones building their entire clinical model around the fact that these conditions rise and fall together, and treating them that way from day one.

How to Create a Cozy Home Atmosphere: Tips for Warm and Inviting Living Spaces

Creating a cozy home atmosphere starts with focusing on warmth, comfort, and personal touches that make a space feel inviting. Key elements include soft lighting, comfortable furniture, and textures like blankets or rugs that add a sense of calm and relaxation.

Choosing the right lighting and scents can instantly change the mood of any room, encouraging a peaceful environment. Incorporating items that have personal meaning or are connected to positive memories further enhances the feeling of coziness.

Understanding Cozy Home Atmosphere

Creating a cozy home involves combining specific physical elements with psychological comfort. It requires attention to lighting, texture, and personal touches. Avoiding common errors helps maintain warmth without clutter or discomfort.

Key Elements of a Cozy Space

Cozy spaces emphasize warm lighting, often using lamps or candles instead of harsh overhead lights. Textures like soft throws, plush rugs, and pillows enhance tactile comfort.

Colors matter as well; earthy tones and muted shades create a relaxing backdrop. Furniture should invite relaxation—think cushioned chairs and positioned seating for easy conversation.

Incorporating personal items like photos or meaningful decor provides a sense of belonging. A balance between functionality and comfort ensures the space is both usable and inviting.

Psychological Benefits of Comfort

A cozy environment reduces stress by triggering feelings of safety and relaxation. Soft textures and warm lighting help lower cortisol levels and promote calmness.

Feeling comfortable at home can improve sleep quality and enhance mood throughout the day. Personalizing the space with familiar objects strengthens emotional connections and a sense of identity.

Comfort also encourages social interaction by creating inviting spaces for gathering, improving mental well-being through connection.

Common Mistakes to Avoid

Avoid cluttering with too many items; excess decor reduces comfort and creates visual stress. Overly bright or cold lighting counters a cozy atmosphere’s intent.

Neglecting the balance between aesthetics and comfort leads to uncomfortable furniture or impractical layouts. Using harsh colors or materials can make the space feel sterile.

Ignoring personal preferences in favor of trends may result in a space that feels impersonal or forced. Comfort is subjective and should reflect the inhabitant’s lifestyle and needs.

Setting the Foundation with Color and Lighting

The right colors and lighting choices shape the mood and comfort of a home. Warm hues and strategic light layering create inviting spaces, while maximizing natural light enhances openness and energy efficiency.

Choosing Warm and Inviting Colors

Selecting colors with warm undertones, such as soft browns, burnt oranges, or muted yellow,s sets a cozy tone. These colors provide a sense of calm and welcome without overwhelming the senses.

Consider using a combination of warm neutrals for walls and accent pieces in richer shades. For example, beige or taupe walls paired with rust-colored pillows or throws offer depth and warmth.

Avoid overly bright or cool colors like stark whites or blues, which can feel sterile or cold. Instead, focus on tones that mimic natural materials such as wood and stone.

Layering Lighting for Ambience

Effective lighting balances functionality and atmosphere through layers: ambient, task, and accent. Ambient lighting provides overall illumination, such as ceiling fixtures or recessed lights.

Task lighting targets specific areas like reading nooks or kitchen counters using table lamps or under-cabinet lighting. Accent lighting highlights artwork or architectural features, adding dimension.

Use dimmers and warm LED bulbs (2700K-3000K) to adjust brightness and temperature. This flexibility allows control over the room’s mood based on time of day or activity.

Maximizing Natural Light

Allowing natural light to fill spaces enhances warmth and reduces reliance on artificial lighting. Keep window treatments light and minimal, like sheer curtains or blinds that can be fully retracted.

Arrange furniture to avoid blocking sunlight. Mirrors placed opposite windows can reflect light deeper into the room.

If privacy is a concern, frosted glass or window films maintain brightness without sacrificing seclusion. Regular window cleaning also improves light quality indoors.

Incorporating Textures and Fabrics

Choosing the right materials and arranging them thoughtfully can greatly enhance warmth and comfort. Combining different textures adds depth and invites touch, helping to make any room feel more welcoming.

Selecting Soft Furnishings

Focus on natural fibers like cotton, wool, and linen for softness and durability. These materials regulate temperature well, keeping you comfortable year-round. Avoid overly slick or stiff fabrics for seating or lounging, as they can feel cold or uninviting.

When picking upholstery or throws, consider plush velvet or chunky knit options. They create a tactile contrast to smoother surfaces like wood or leather. Use rich, muted tones or subtle patterns to avoid overwhelming the space visually while still adding interest.

Layering Rugs and Blankets

Layering rugs of different sizes and textures adds visual warmth and comfort underfoot. Place a soft wool or shag rug over a flat-weave base for contrast. This also helps define areas within larger rooms.

Keep blankets within easy reach on sofas or chairs. Materials like fleece, alpaca, or thick woven cotton provide warmth and a tactile element. Fold blankets neatly or drape casually to add informal charm. Stick to color palettes that complement your room for cohesion.

Using Curtains and Cushions Effectively

Heavy curtains in materials like velvet or thick linen block drafts and visually frame windows. Use lined curtains for better insulation and light control. Choose colors or patterns that link back to furnishings and décor.

Cushions are an easy way to mix textures without permanent changes. Combine smooth fabrics with nubby weaves or embroidered details. Use varying sizes and shapes to introduce dimension. Keep cushion covers removable for cleaning and seasonal swaps.

Personalizing Your Space for Comfort

Adding personal touches transforms a house into a home. Choosing meaningful decor, arranging photos thoughtfully, and displaying collections can make spaces feel more inviting and uniquely yours.

Displaying Sentimental Decor

Sentimental decor conveys personal history and emotions. Items such as heirlooms, travel souvenirs, or handmade crafts carry stories that enrich your surroundings.

Place these items where they can be easily seen, like on shelves, mantels, or side tables. Ensure they complement the room’s color scheme and style to avoid clutter.

Using groupings or themed arrangements enhances visual interest. For example, grouping vintage items together with warm lighting invites curiosity without overwhelming the space.

Arranging Family Photos

Family photos create a sense of belonging and warmth. Select a variety of sizes and frame styles for a dynamic look.

Arrange photos in clusters or galleries on walls, mixing candid shots with formal portraits. Keep the layout balanced by spacing and alignment.

Use shelves or ledges to layer photos with other objects like plants or books. This approach adds depth and texture to the display while keeping it personal.

Showcasing Personal Collections

Personal collections reflect interests and personality. Whether it’s books, vinyl records, or pottery, collections add character to any room.

Organize collections by theme, color, or size for a cohesive appearance. Use dedicated shelves, display cases, or open spaces to highlight key pieces.

Rotate items periodically to keep the display fresh and maintain interest. Avoid overcrowding to ensure each item stands out clearly.

Soothing Scents and Sounds

Creating a calming atmosphere involves carefully selecting scents and sounds that promote relaxation and comfort. Using natural aromas, soft music, and greenery can significantly affect mood and ambiance.

Integrating Candles and Diffusers

Candles and diffusers offer controlled ways to introduce pleasant scents into a home. Choose candles made from soy or beeswax with essential oils like lavender, eucalyptus, or chamomile for calming effects.

Diffusers disperse essential oils evenly, providing a consistent aroma without an open flame. Ultrasonic diffusers are quiet and double as humidifiers, improving air quality.

Place candles or diffusers in living rooms and bedrooms, avoiding areas with heavy drafts. Limit use to prevent overwhelming scents by running diffusers for 30-60 minutes at a time.

Choosing Relaxing Background Music

Background music should create a peaceful environment without drawing attention. Instrumental genres like classical, jazz, or ambient electronic tracks work well.

Maintain a low volume that fills the space gently without overpowering conversation or daily noises. Playlists that include nature sounds—rain, ocean waves, or birdsong—can enhance relaxation.

Consider streaming services with pre-made “relaxation” or “focus” playlists. Adjust tracks to fit the time of day, using mellow tones in the evening and subtly upbeat rhythms during the day.

Adding Indoor Plants

Indoor plants improve air quality and add a natural, soothing element. Opt for low-maintenance plants such as snake plants, pothos, or peace lilies.

Place them where they receive appropriate light, but don’t clutter key living areas. The visual presence of greenery reduces stress and brings a sense of calm.

Regularly water and dust plants to keep them healthy. Grouping several small plants together can create a mini indoor garden, increasing their impact on the atmosphere.

Organizing for a Clutter-Free Environment

Creating a clutter-free home involves removing unnecessary items, optimizing storage, and maintaining tidiness every day. These steps help keep living spaces comfortable and easy to navigate.

Decluttering Essentials

Start by sorting possessions into categories: keep, donate, recycle, or discard. Focus on items not used within the last six months as prime candidates for removal.

Use clear bins or labeled boxes to separate these categories. This makes the process manageable and reduces decision fatigue.

Make it a habit to tackle one small area at a time—such as a drawer or shelf—to avoid feeling overwhelmed. Regular decluttering prevents accumulation and keeps spaces functional.

Implementing Smart Storage Solutions

Choose storage that fits the available space and suits your belongings. Vertical shelving units maximize wall space without crowding the room.

Invest in multi-functional furniture, like ottomans with hidden compartments or beds with drawers underneath. These provide storage without adding clutter.

Clear, labeled containers allow for easy identification of contents. Avoid opaque boxes that require unpacking to see what’s inside.

Consider hooks or pegboards for frequently used items to keep them accessible and off surfaces.

Maintaining Order Daily

Develop simple routines to keep clutter from building up again. Spend 10 minutes each day returning items to their designated places.

Create specific spots for everyday essentials, such as keys and mail, to limit surface mess. Use trays or bowls to gather these items neatly.

Encourage everyone in the home to participate in tidying up. Shared responsibility helps maintain order and reduces last-minute cleanups.

Creating Inviting Functional Spaces

Effective use of space balances comfort with practicality. Thoughtful placement, suitable lighting, and purposeful furnishings enhance usability while promoting relaxation.

Designing Cozy Reading Nooks

Select a quiet corner away from heavy foot traffic for your reading nook. A comfortable armchair or chaise lounge with supportive cushioning is essential.

Use soft, warm lighting such as a floor lamp with adjustable brightness. Incorporate a small side table for books, drinks, or reading glasses.

Add texture with throw blankets and pillows made from materials like wool or cotton. A rug underfoot can increase warmth and define the space visually.

Consider shelves nearby for book storage or decorative items. Keep distractions minimal by avoiding noisy electronics.

Arranging Comfortable Gathering Areas

Focus on seating arrangements that encourage conversation, such as sofas and chairs placed facing each other. Include various seating types to accommodate different preferences.

Use a central coffee table or ottoman for convenience and to anchor the space. Choose materials and colors that complement the room’s palette but withstand frequent use.

Lighting should be layered—overhead fixtures combined with table or floor lamps—to create flexibility depending on the mood or activity.

Ensure there’s enough space for movement without overcrowding. Add soft textiles like cushions and throws to invite relaxation and warmth.

Seasonal Touches for Year-Round Coziness

Adjusting your home’s atmosphere as the year progresses can sustain comfort and warmth through all seasons. Simple changes to decor and textiles make a noticeable difference without requiring a complete overhaul.

Adapting Decor for Different Seasons

Focus on color schemes to instantly set the seasonal mood. For spring and summer, incorporate light pastels and natural greens. Use floral arrangements, either fresh or faux, to bring freshness indoors.

In fall and winter, switch to deeper tones like burnt orange, deep reds, and dark greens. Introduce rustic elements such as wooden accents, pine cones, or lanterns. Candles with seasonal scents like cinnamon or pine enhance the feel without clutter.

Keep decor practical, avoiding oversaturation. Rotate smaller items such as cushions or throws instead of large furniture pieces. This saves space and money while maintaining a seasonal vibe.

Transitioning Textiles with Weather

Textiles are key to maintaining coziness through varying temperatures. Choose lightweight cotton or linen fabrics for summer upholstery and curtains to keep rooms breathable and cool.

When colder months arrive, swap these for heavier materials: wool, velvet, or flannel work well. Layering throws and pillows made with these fabrics adds both warmth and texture.

Invest in washable or easy-care textiles, as seasonal changes often mean more frequent cleaning. Even small changes, like switching out table runners or adding a plush rug, increase comfort while reflecting the season.

Final Tips for Maintaining a Cozy Home

Consistency is key to keeping your home cozy. Regularly declutter to maintain a neat environment that feels calm and inviting. Even small efforts, like wiping surfaces or fluffing pillows, make a noticeable difference.

Lighting plays a crucial role. Use warm-toned bulbs and take advantage of natural light during the day. Consider adding dimmers or fairy lights to adjust the ambiance as needed.

Incorporate scents that promote relaxation. Essential oils, candles, or simmering spices can enhance the atmosphere without overwhelming the space. Choose subtle, natural fragrances.

Here’s a quick checklist to maintain coziness:

Task Frequency
Dust and vacuum Weekly
Wash throws/pillows Biweekly
Rotate decor items Monthly
Check lighting Monthly

Textiles should be washed regularly to keep them fresh and inviting. Rotate seasonal items like blankets and rugs to match the weather and mood of your home.

Lastly, involve everyone in the household. Shared responsibility helps sustain a cozy environment and makes it more enjoyable for all.

How to Organize Bathroom Storage for Maximum Efficiency and Space Optimization

Bathroom storage can quickly become cluttered without a clear plan. Maximizing vertical space, using clear containers, and grouping similar items together are key strategies to organize efficiently. These simple techniques reduce mess and make daily routines smoother.

Small bathrooms especially benefit from smart storage solutions like over-the-toilet shelves and drawer dividers. Choosing the right tools helps keep everything visible and accessible, cutting down on time spent searching for essentials.

Assessing Your Bathroom Storage Needs

Start by understanding how your current bathroom items are stored and used daily. Recognizing problem areas and deciding which belongings need the most accessible storage will guide efficient organization.

Evaluating Current Organization

Begin by taking stock of all items in the bathroom, including toiletries, towels, cleaning supplies, and any other essentials. Note where everything is placed now and how often each item is used.

Identify if certain things are rarely accessed or cluttered in inconvenient spots. Check for expired products or unused items that could be removed.

Document the types of storage you already have, such as cabinets, shelves, or drawers. Assess whether these options are fully utilized or poorly arranged.

Identifying Storage Challenges

Pinpoint common issues like limited counter space, overcrowded cabinets, or a lack of vertical storage. Spot problems caused by moisture damage or items frequently falling out of places.

Consider if the layout restricts access to certain areas or if some storage units are too high or low for comfortable reach. Assess if duplicate items or excess packaging contribute to clutter.

List obstacles such as poor lighting or insufficient ventilation that worsen storage problems. Recognizing these challenges helps determine practical storage solutions to implement.

Setting Storage Priorities

Decide which bathroom items need quick and easy access, such as daily-use products like toothpaste and soap. Separate these from less frequently used items like seasonal products or extra toilet paper.

Prioritize storage solutions that fit your space and lifestyle. For example, stackable bins suit small bathrooms, while pull-out drawers benefit larger ones.

Create a plan dividing items by category (e.g., grooming, linen, cleaning) and assign dedicated storage spots. Focus on maximizing space efficiency and minimizing clutter.

Decluttering for Efficient Storage

Effective bathroom storage begins with eliminating clutter and preparing the space to maximize usability. This process involves identifying what to keep or remove and ensuring the storage areas are clean and ready for organization.

Sorting and Purging Unused Items

Start by emptying all bathroom cabinets, drawers, and shelves. Lay everything out in plain sight to assess what is actually being used. Check expiration dates on products like toiletries and medications, discarding anything expired or unusable.

Items not used in the last six months should be considered for removal. Duplicate products, old makeup, and empty containers often take up unnecessary space. Be honest about what you realistically need to keep.

Establishing Keep, Toss, and Donate Categories

Divide items into three clear groups: Keep, Toss, and Donate.

  • Keep: Items used daily or regularly, in good condition, and unexpired.
  • Toss: Expired products, broken containers, or anything unsanitary.
  • Donate: Unopened, gently used items that others might need.

Label containers or bags for each category to maintain order during the process’s next steps and avoid confusion.

Cleaning and Preparing Storage Areas

Once emptied and sorted, clean all surfaces inside cabinets, drawers, and shelves with disinfectant. Remove dust, debris, or spilled product residue to prevent contamination.

Consider lining shelves with waterproof, non-slip liners to protect surfaces and keep items stable. Ensure lighting is adequate, and check for any needed repairs, like loose shelves or hinges, before replacing items.

Maximizing Vanity and Under-Sink Space

Efficient use of vanity and under-sink areas can dramatically improve bathroom organization. Implementing smart storage solutions tailored to these specific spaces helps keep items accessible and clutter-free.

Using Stackable Organizers

Stackable organizers create vertical storage, making the most of limited space under the sink or inside vanity cabinets. Choose clear acrylic or plastic bins to easily identify contents without opening each container.

Use trays with removable dividers or multi-tiered shelves to separate skincare products, hair tools, and cleaning supplies. Label each stack to maintain order and avoid frequent shifting.

Stackables should fit height and width constraints to maximize available volume. Avoid overloading stacks to maintain stability and ease of access.

Incorporating Drawer Dividers

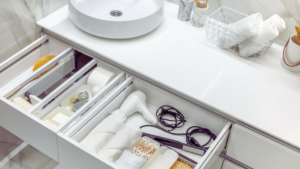
Drawer dividers break up vanity drawers into sections, preventing items like brushes, cosmetics, or dental care products from mixing. They create designated spots and reduce the time spent searching for small essentials.

Adjustable dividers are preferred for flexibility, as bathroom needs often change. Materials like bamboo or plastic blend durability with easy cleaning.

Use shallow compartments for frequently used items and deeper sections for bulkier goods. Keep similar items grouped to streamline morning and nighttime routines.

Managing Plumbing Constraints

Under-sink storage is often limited by plumbing pipes. To work around this, use custom or adjustable shelving that fits around the plumbing lines without blocking access.

Consider flexible baskets or pull-out bins that can be repositioned easily to avoid interference with pipes. Corner shelves can utilize awkward spaces behind the trap.

If space allows, install a shallow drawer above the plumbing area to hold flat items such as hairbrushes or toothpaste tubes. Plan storage based on plumbing layout to avoid frequent rearranging or damage.

Utilizing Vertical and Wall Space

Maximizing bathroom storage often means looking up and using empty wall areas. This approach helps keep countertops clear and creates more room, especially in small bathrooms.

Installing Floating Shelves

Floating shelves are a sleek, space-saving solution that can be installed at various heights. Use shelves made from moisture-resistant materials like glass or treated wood to withstand humidity.

Place everyday items such as toiletries or decorative containers within easy reach. Mixing open shelves with small baskets or bins keeps smaller items organized and clutter-free.

Avoid overcrowding; leave enough space between shelves to store taller items like lotion bottles or rolled towels. Proper anchoring into studs ensures shelves hold weight safely.

Adding Over-the-Toilet Storage

Over-the-toilet units make use of often-wasted vertical space while keeping essentials accessible. Select designs that fit the clearance above the toilet without overwhelming the area.

Look for slim metal or wooden shelving units that offer multiple shelves or cabinets. These can store toilet paper, extra towels, and cleaning supplies neatly.

Ensure the unit is stable and leaves enough headroom. Wall-mounted options can save floor space and add to the room’s aesthetic.

Using Hooks and Rails for Accessories

Hooks and rails are perfect for hanging towels, robes, and frequently used accessories. Install towel bars at arm’s length for convenience and prevent dampness build-up by spacing them properly.

Use multiple small hooks or a rail with hooks in an area near the shower or sink. This setup can hold loofahs, brushes, hairdryers, or even a small basket for combs.

Metal or waterproof plastic hooks resist rust and wear. Adjustable or movable rails offer flexible storage that can adapt as needs change.

Optimizing Cabinet and Drawer Storage

Effective storage in cabinets and drawers depends on arranging items for easy retrieval and maximizing space efficiency. Using tailored solutions enhances organization and keeps items visible and accessible.

Customizing Drawer Inserts

Drawer inserts should fit the size and shape of the items stored. Adjustable or modular inserts work well for varying needs, such as separating makeup tools, grooming devices, or small bottles.

Choose inserts made from materials that resist moisture, like plastic or coated wood. This prevents warping or damage in a humid bathroom environment. Inserts with divided compartments prevent clutter by keeping similar items grouped, reducing the time spent searching.

Deep drawers benefit from inserts that allow stacking or layering while keeping items stable. Inserts also protect fragile items from shifting around during cabinet use.

Selecting Appropriate Bins and Baskets

Bins and baskets should fit within cabinet dimensions to avoid wasted space. Use clear or open designs to help identify contents quickly.

Material choice is important: plastic bins resist moisture, while woven baskets offer aesthetic appeal but require a liner in damp areas. Stackable bins maximize vertical space.

Group similar items, like hair products or cleaning supplies, within individual containers for easy removal and replacement. Use small bins for tiny items, which otherwise scatter and create disorder.

Labeling for Quick Access

Labels improve identification and speed up retrieval. Use waterproof labels to withstand bathroom humidity.

Label containers by category, like “Toothbrushes,” “Skincare,” or “Cleaning Supplies.” Choose clear fonts and contrast colors for readability.

Label placement matters: place them on the front or top of containers where they are easily seen. Removable labels allow flexibility for changing contents without confusion.

Creating Storage Solutions for Small Bathrooms

Maximizing space in a small bathroom requires smart choices that combine function and efficiency. Selecting furniture that serves multiple purposes and finding hidden storage can dramatically improve organization without crowding the room.

Choosing Multipurpose Furniture

Multipurpose furniture helps reduce clutter and frees up valuable floor space. Look for vanities with built-in drawers or shelves that can store toiletries, towels, and cleaning supplies together. A mirror cabinet offers storage behind the reflection, keeping items off counters.

Consider small stools or benches with internal storage for extra toilet paper or bath toys. Wall-mounted units that integrate towel racks and shelves save space by utilizing vertical areas. Choose pieces with clean lines and neutral colors to keep the bathroom feeling open and less crowded.

Utilizing Hidden Storage Options

Hidden storage solutions exploit unused or concealed areas that often go overlooked. Install recessed shelves inside shower walls or create niches to hold shampoo and soap without additional caddies. Under-sink areas can be optimized with stackable containers or sliding baskets.

Behind the door, mounts or hooks offer spots for robes and towels without intrusion. Magnetic strips inside cabinets keep metal tools organized and accessible. Concealed storage maintains a clean look while providing practical spots for everyday items.

Organizing Shower and Bathtub Areas

Maximizing space and accessibility in shower and bathtub areas requires the right storage tools and strategies. Effective use of corners and containment options ensures items stay tidy and within reach.

Using Caddies and Corner Shelves

Caddies and corner shelves make use of underutilized spaces, especially in small showers. Choose rust-resistant materials like stainless steel or plastic to withstand moisture.

Install corner shelves at reachable heights without obstructing movement. Adjustable tension pole caddies fit between the floor and the ceiling, offering multiple tiers without permanent fixtures.

Magnetic or suction cup caddies provide flexibility but ensure a strong hold to avoid falls. Keep items organized by category—shampoos on one shelf, soaps on another—to reduce clutter.

Managing Bottles and Dispensers

Group bottles by type and size to prevent overcrowding. Consider using wall-mounted dispensers for shampoo, conditioner, and body wash to save shelf space and reduce bottle clutter.

Clear labeling or color coding helps quick identification. Use refillable dispensers to reduce waste and maintain consistency.

Keep frequently used products within easy reach to improve convenience. Store infrequently used items in shower niches or baskets higher up to maintain order.

Storing Towels and Linens Effectively

Proper techniques for folding or rolling towels maximize space and maintain order. Strategic placement improves accessibility and keeps linens fresh and easy to grab when needed.

Rolling and Folding Techniques

Rolling towels saves space and reduces wrinkles. Start by folding the towel in thirds lengthwise, then roll it tightly from one short end to the other. This method makes towels compact and stackable in baskets or shelves.

Folding is better for larger linens like bath sheets or sheets. Fold towels in half widthwise, then in thirds lengthwise to create a neat rectangular shape. Store folded piles vertically, like files, to easily see and access each item.

Use labels for different towel sizes or linen types. This helps maintain organization without repeatedly unfolding stacks. Avoid overly tight rolls or folds that can cause creases or damage the fabric fibers.

Placement for Accessibility

Store everyday towels within easy reach, such as on open shelves or hooks near the shower area. Reserve higher shelves or closed cabinets for guest towels and seasonal linens since they are used less often.

Keep frequently used towels in breathable containers or open baskets to promote airflow and prevent musty odors. Avoid plastic bags or sealed containers that trap moisture.

Arrange towels by type and size to avoid rummaging. For example, stack washcloths separately from hand towels and bath towels. This reduces clutter and speeds up laundry rotation.

Maintaining an Organized Bathroom

Consistent upkeep and occasional updates are crucial to keeping bathroom storage functional and clutter-free. Regular effort prevents mess buildup, while timely changes ensure storage meets current needs.

Establishing Routine Tidying

Set a specific time each day or week to put items back in their designated spots. Small tasks like wiping shelves, refolding towels, and disposing of empty containers save time and reduce clutter.

Use a checklist to track daily, weekly, and monthly tidying tasks:

Frequency Task
Daily Clear countertops, hang towels
Weekly Wipe shelves, clean bins
Monthly Sort through toiletries

Stick to this routine to maintain order and prevent overflow. Rotate items regularly to ensure older products get used first and expired ones are discarded.

Updating Storage Solutions Over Time

Monitor how well your current storage serves your needs. If baskets fill too quickly or shelves sag, consider upgrading with more durable or larger containers.

Adjust storage based on changing habits or products. For example, swap a small drawer organizer for stackable shelves if your collection of skincare grows.

Add labels or transparent containers to quickly locate items without disruption. Periodically review and remove unused or expired products to keep space optimized.

How to Clean and Organize a Garage Efficiently for Maximum Space and Functionality

Cleaning and organizing your garage can transform a cluttered space into a functional area for storage, projects, or parking. The key to an effective garage cleanup is sorting items into categories, decluttering what you no longer need, and creating designated zones for remaining belongings.

A clear plan helps maintain order, making it easier to find tools and supplies quickly. With the right approach, your garage can become a well-organized, efficient space without overwhelming effort.

Planning Your Garage Cleaning and Organization

Effective cleaning and organizing require clear objectives, a practical schedule, and the right tools. Focusing on these aspects upfront makes the project manageable and efficient.

Setting Goals and Priorities

Start by defining what you want to achieve with your garage space. Identify key purposes like storage, workspace, or vehicle parking. This clarity helps determine which areas need the most attention.

Prioritize based on daily use and accessibility. For example, frequently used tools should be easily reachable, while seasonal items can be stored higher or farther back. Consider limiting what stays in the garage to avoid clutter.

Write down specific goals, such as creating dedicated zones for sports equipment, gardening tools, and automotive supplies. These priorities guide decisions during the sorting and organizing stages.

Creating a Timeline

Break the project into clear phases with deadlines. A realistic schedule reduces overwhelm and tracks progress steadily. For example, devote a weekend to sorting, another ftocleaning, and a final one for organizing.

Include buffer days for unexpected tasks or delays. Depending on garage size and clutter, cleaning could take from a few hours to several days. Commit to working in focused sessions instead of trying to finish all at once.

Use a checklist or calendar to monitor each phase. Adjust your timeline based on your availability and pace to keep the project on track.

Gathering Necessary Supplies

Prepare all cleaning and organizing materials before starting. Essential supplies include heavy-duty trash bags, gloves, cleaning solutions, microfiber cloths, and a broom or shop vacuum.

For organization, gather shelves, clear bins, hooks, pegboards, and labels. Choose storage solutions based on your garage layout and goals. For example, wall-mounted shelves save floor space, while labeled bins improve item retrieval.

Having all supplies ready avoids interruptions and speeds up the process. Keep tools and materials in one accessible area during the project.

Decluttering Your Garage

Clearing out your garage starts with a systematic process. Group similar items together and make decisions based on their condition and usefulness. Pay close attention to safety when handling certain materials.

Sorting and Categorizing Items

Begin by emptying shelves, bins, and storage areas. Lay items out visibly to better assess what you have. Use the following categories for sorting:

  • Tools and hardware
  • Sports and outdoor gear
  • Seasonal decorations
  • Automotive supplies
  • Gardening equipment
  • Miscellaneous items

Label containers or boxes for each category. This will aid in organization and help decide what to keep. Sorting prevents overlooked clutter and makes the next steps easier.

Deciding What to Keep, Donate, or Discard

Evaluate each item’s condition and frequency of use. Keep tools and gear that are functional and regularly used. Donate items in good condition but no longer needed, such as sporting goods or extra tools. Discard broken, expired, or unsafe items immediately.

Use criteria like:

  • Has it been used in the last year?
  • Is it repairable or functional?
  • Will it be needed in the foreseeable future?

This process reduces unnecessary clutter and frees up valuable space.

Handling Hazardous Materials

Identify any chemicals, paint, batteries, or automotive fluids. These require special disposal methods due to environmental risks. Store materials like pesticides or solvents in tightly sealed containers away from children and pets.

Contact local hazardous waste facilities for safe disposal options. Never pour hazardous liquids down drains or onto soil. Proper handling protects your health and complies with regulations.

Deep Cleaning the Garage Space

Start by emptying the garage completely to access every surface. After that, focus on removing dust, debris, and grime from all areas. Finally, address any stains and odors to restore the space.

Clearing Out the Garage

Remove all items from the garage, including tools, boxes, and furniture. Sort items into categories: keep, donate, discard, or relocate. This step makes cleaning easier and helps identify clutter.

Inspect corners, shelves, and hidden spaces for pests or mold. Use gloves and a mask if necessary. Ensure the garage is well-ventilated during this process.

Dusting, Sweeping, and Mopping

Start by dusting ceiling corners, light fixtures, rafters, and walls using a long-handled duster or a vacuum with attachments. Work from top down to avoid spreading dust onto cleaned areas.

Sweep the floor thoroughly with a stiff-bristle broom, focusing on dirt, cobwebs, and debris buildup. Use a mop with warm water and a mild detergent for concrete floors. Avoid excessive water to prevent damage.

Removing Stains and Odors

Use a degreaser or concrete cleaner for oil and grease stains. Apply the cleaner, scrub with a stiff brush, and rinse well. For rust stains, apply a mix of lemon juice and baking soda or a commercial rust remover.

To eliminate odors, sprinkle baking soda on the floor and let it sit for several hours before sweeping. Use activated charcoal or commercial odor absorbers to maintain freshness. Keep the garage ventilated to reduce moisture and prevent musty smells.

Maximizing Storage Solutions

Effective garage storage requires carefully selected furniture and smart use of available space. Combining sturdy shelving and cabinets with vertical and overhead options creates room while keeping items accessible.

Choosing Shelving and Cabinets

Shelving units should be strong enough to hold heavy tools and bins, ideally made of metal or high-quality plastic. Adjustable shelves add flexibility for storing different-sized objects.

Cabinets provide concealed storage, useful for hazardous materials or smaller tools. Look for lockable and moisture-resistant models to protect contents. Measure your garage space before purchasing to ensure a proper fit.

Arrange frequently used items at eye level. Use clear, labeled bins on shelves for easy identification. Group similar items together—gardening tools, automotive supplies, etc.—to maintain order.

Utilizing Wall and Overhead Storage

Wall-mounted systems use hooks, pegboards, and rails to keep tools visible and off the floor. Heavy-duty hooks can support bicycles, ladders, and large equipment efficiently.

Overhead racks free up floor space by storing seasonal or rarely used items near the ceiling. Confirm your garage ceiling height and joist depth before installation to ensure safety.

Both solutions help maintain clear walking paths and prevent clutter buildup. Use wall baskets or shelves for small parts, and consider fold-down workbenches to save space when not in use.

Organizing Tools and Equipment

Effective organization involves categorizing items based on use and size, while maximizing space through smart storage solutions. Proper labeling and accessibility boost efficiency, reducing time spent searching for tools or gear.

Arranging Hand Tools and Power Tools

Start by sorting hand tools like hammers, screwdrivers, and wrenches by type and frequency of use. Use pegboards with hooks to hang tools visibly on walls. This keeps tools off surfaces and within reach.

For power tools, dedicate sturdy shelves or cabinets. Store cords neatly using cable ties or reels to prevent tangling. Keep batteries and chargers in clear containers labeled with the tool they correspond to.

Small items like nails and screws belong in labeled bins or compartment organizers, making retrieval faster. Group related tools together to streamline project preparation and avoid clutter.

Storing Sports Gear and Outdoor Equipment

Sports gear should be stored in designated bins or racks based on type—balls, bats, helmets, etc. Use clear, stackable containers with labels for smaller items like gloves or pads, which keeps them visible and contained.

For bulky outdoor equipment such as lawnmowers or shovels, install wall-mounted hooks or ceiling hoists to save floor space. Keep frequently used items within easy reach, and store seasonal equipment higher or in less accessible areas.

Consider combining storage solutions for mixed gear to maintain order and prevent damage, ensuring everything stays clean and functional.

Safely Storing Seasonal and Bulky Items

Proper storage of large and seasonal items helps maximize garage space and prevents damage. Prioritizing accessibility, protection from pests, and safe lifting techniques will keep your belongings in good condition.

Organizing Holiday Decorations

Use clear, labeled plastic bins to store holiday decorations instead of cardboard boxes. This protects them from moisture and pests while making it easier to identify contents without opening each container. Group decorations by holiday or type, such as lights, ornaments, and outdoor items.

Stack heavier bins on the bottom and place lighter ones on top to avoid crushing fragile items. Consider using shelving units to keep bins off the floor, reducing the risk of water damage. For delicate items, wrap them individually in bubble wrap or acid-free paper before placing them in bins.

Managing Lawn and Garden Supplies

Store chemicals like fertilizers and pesticides in a locked, ventilated cabinet away from children and pets. Keep gardening tools organized on wall-mounted racks or pegboards. This not only saves floor space but also prevents injury from stepping on sharp tools.

Bulky items like lawnmowers and hoses should be cleaned and dried before storage to prevent rust and mold. Coil hoses and hang them on heavy-duty hooks. Always elevate equipment off the concrete floor using mats or pallets to avoid moisture accumulation.

Maintaining an Organized Garage

Regular attention and consistent actions keep a garage tidy and functional. Small daily habits paired with scheduled cleanings prevent clutter buildup and maintain order.

Implementing Ongoing Organization Habits

Create simple routines, such as returning tools to designated spots immediately after use. Label shelves, bins, and hooks clearly to reduce time spent searching for items.

Use vertical storage solutions to keep floors clear. Place frequently used items at eye level for easy access. Group similar items together—for example, gardening tools in one area and automotive supplies in another.

Limit new items brought into the garage by evaluating what’s truly needed. Discard or donate unused items regularly. These habits reduce clutter accumulation and save time during deeper cleanings.

Scheduling Regular Cleaning

Set a specific day each month for a thorough garage inspection and cleaning. Clear all surfaces, sweep floors, and wipe down shelves. Check for dust, cobwebs, and spills.

Use this time to reorganize any displaced items and adjust storage solutions as needed. Remove unwanted objects to maintain space.

Consider seasonal reviews: more frequent cleanings in spring and fall help manage changing storage needs tied to outdoor equipment or holiday items. Consistency in cleaning schedules supports long-term garage upkeep.

Enhancing Garage Usability

Optimizing the garage involves addressing both physical comfort and functionality. Key improvements include adjusting lighting and airflow to create a more inviting space, along with establishing clear zones for different activities.

Improving Lighting and Ventilation

Bright, even lighting reduces eyestrain and helps identify tools or supplies quickly. Install LED overhead lights for energy efficiency and durability. Consider adding task lighting near workbenches or storage areas to enhance visibility where precise work occurs.

Natural ventilation is essential to prevent odors and moisture buildup. Use exhaust fans or install vents near the roofline to promote air circulation. If possible, add windows or a screen door to encourage fresh air flow without sacrificing security.

Combining these lighting and ventilation strategies increases comfort and safety in the garage, making it a more usable environment throughout the year.

Creating Dedicated Work or Hobby Areas

Designate specific zones for activities like woodworking, vehicle maintenance, or gardening to improve organization. Use durable surfaces, such as stainless steel or treated wood, for workbenches to withstand heavy use.

Install pegboards or wall-mounted racks to keep tools visible and accessible. Allocate storage bins or drawers for smaller items, labeling them clearly to save time. Consider seating or mats designed to reduce fatigue during long tasks.

Separating workspaces from storage minimizes clutter and keeps projects focused. This approach increases efficiency and ensures the garage supports a range of hobbies or repairs with ease.

How to Maintain Home Appliances for Long-Lasting Performance and Efficiency

Maintaining home appliances ensures they function efficiently and last longer. Regular cleaning, timely servicing, and following the manufacturer’s guidelines help prevent breakdowns and costly repairs.

The key to effective appliance maintenance is consistent care through simple tasks like cleaning filters, checking seals, and avoiding overuse. Small actions taken regularly can save money and improve appliance performance over time.

Knowing how to spot early warning signs of issues also plays a vital role. Understanding basic troubleshooting and when to call a professional keeps appliances running smoothly and safely.

Understanding the Basics of Home Appliance Maintenance

Maintaining home appliances involves knowledge of why it’s important, the common reasons they fail, and how to recognize early problems. Addressing these factors helps prolong appliance life and avoid costly repairs.

Why Regular Maintenance Matters

Regular maintenance keeps appliances running efficiently and reduces energy consumption. For example, cleaning refrigerator coils improves cooling performance, saving electricity.

Consistent upkeep can prevent minor issues from becoming major malfunctions. Skipping maintenance often leads to more frequent breakdowns and higher repair costs.

Scheduling routine checks, such as inspecting seals, changing filters, or cleaning vents, can extend an appliance’s lifespan. This practice also helps maintain warranty coverage in some cases.

Common Causes of Appliance Failure

Most appliance breakdowns result from neglect, wear and tear, or improper use. Dirt build-up, clogged filters, and faulty wiring are frequent culprits.

Moisture and overheating often damage internal components, especially in washers and dryers. Lack of lubrication in mechanical parts also causes premature failure.

Using appliances beyond their recommended capacity or ignoring unusual noises accelerates damage. Power surges can harm electrical systems if surge protectors aren’t used.

Identifying Warning Signs

Unusual sounds like grinding or buzzing can indicate worn-out motors or loose parts. Smells such as burning or mildew should be addressed immediately.

Increased energy bills may signal inefficiency, often from dirty filters or failing parts. Water leaks or slow drainage point to plumbing issues in dishwashers and washing machines.

Frequent cycling on and off is a sign of thermostat or control board problems. Noticing these signs early helps avoid full breakdowns and lengthy repairs.

General Maintenance Tips for All Appliances

Proper care extends the lifespan and efficiency of any home appliance. Regular cleaning, strategic placement, careful monitoring of connections, and planned inspections contribute significantly to optimal performance.

Cleaning Best Practices

Regular cleaning prevents dust, grime, and residue buildup that can impair appliance function. Use a soft, dry cloth for exterior surfaces and mild detergent diluted in water for tougher stains. Avoid abrasive materials that may scratch finishes.

For internal parts like filters or vents, follow manufacturer guidelines to avoid damage. For example, refrigerator coils should be vacuumed every six months to maintain cooling efficiency. In washing machines, run a cleaning cycle monthly using a specialized cleaner or vinegar to remove detergent residues and odors.

Always unplug appliances before cleaning to reduce electric shock. Document cleaning schedules to keep a routine and ensure no area is overlooked.

Optimal Placement and Ventilation

Appliances require well-ventilated spaces to avoid overheating and increased energy consumption. Place machines at least 3-4 inches away from walls to allow airflow, especially for refrigerators and dryers.

Avoid damp or enclosed areas to reduce corrosion and mold growth. For ovens and microwaves, keep the clearance around vents clear of obstructions to disperse heat properly.

Consider ambient temperature and humidity. Avoid high-heat areas near stoves or direct sunlight that can degrade plastic components and affect sensor accuracy.

Using appliance stands or adjustable feet can improve stability and airflow underneath units, enhancing their longevity.

Checking Power and Water Connections

Inspect power cords and plugs regularly for fraying, cracks, or loose connections. Replace damaged cords immediately to prevent electrical fires or malfunctions. Confirm outlets are grounded and compatible with your appliance’s voltage requirements.

For water-dependent appliances like dishwashers and washing machines, examine hoses and fittings for leaks or bulges. Replace hoses every 3-5 years, regardless of visible damage, to avoid sudden bursts.

Use shutoff valves to control water flow during maintenance or extended periods of non-use. Test electrical outlets periodically by plugging in another device to ensure a consistent power supply.

Document repair or replacement dates to track component health over time.

Scheduling Routine Inspections

Set a calendar reminder for biannual or annual inspections, depending on appliance type and usage frequency. Professional technicians can identify wear and tear invisible to casual users.

During inspections, check seals, gaskets, heating elements, motors, and electronic controls. Replacing worn parts promptly prevents inefficiencies and breakdowns.

Keep warranty and service records organized for quick access during inspections or repairs. If you notice unusual noises, smells, or performance drops, schedule inspections immediately rather than waiting for a planned date.

Integrate inspections with seasonal changes, such as before winter for heaters or after summer for air conditioners, to optimize readiness.

Proper Care for Kitchen Appliances

Maintaining kitchen appliances requires regular cleaning and attention to specific components that affect performance. Proper care prevents breakdowns and keeps devices efficient.

Refrigerator Cleaning and Coil Maintenance

Clean the refrigerator interior monthly using a mixture of warm water and baking soda to remove odors and stains without harsh chemicals. Wipe shelves, drawers, and door seals thoroughly to prevent mold and bacteria build-up.

Check the condenser coils every six months. Dust and debris on coils reduce cooling efficiency and increase energy use. Use a coil brush or vacuum with a soft brush attachment to gently remove dirt. Keep the fridge clear of items blocking ventilation.

Inspect door gaskets for cracks or tears to maintain a tight seal. Replace damaged gaskets to avoid cold air loss. Keep the drip pan clean and dry to prevent mold growth.

Dishwasher Filter and Spray Arm Care

Remove and clean the dishwasher filter monthly to avoid clogging. Rinse it under running water and remove trapped food particles. A clogged filter reduces water flow and cleaning power.

Check spray arms for blockages. Remove them according to your model’s instructions, and clean holes with a toothpick or small brush to ensure water sprays evenly. Replace any damaged spray arms for optimal performance.

Run an empty cycle with a dishwasher cleaner or white vinegar every few months to eliminate limescale and grease buildup inside the machine, improving wash quality.

Oven and Stove Cleaning Procedures

Clean the oven after every few uses to prevent the buildup of grease and food residue that can cause smoke or odors. Use non-abrasive cleaners or a mixture of baking soda and water for a safer approach.

Wipe stove burners and drip pans after each cooking session. Remove burner grates and soak them in warm, soapy water regularly. For electric coil stoves, carefully clean around burners without submerging electrical parts.

Check oven door seals for cracks or gaps, and replace if necessary to maintain heat efficiency. Clean control knobs and buttons with a damp cloth to avoid grime accumulation that can affect functionality.

Maintaining Laundry Appliances

Regular upkeep of washing machines and dryers improves efficiency and extends their lifespan. Proper cleaning and ventilation reduce odors, prevent damage, and maintain performance.

Washing Machine Drum and Seal Cleaning

The washing machine drum should be cleaned monthly to avoid residue buildup. Run an empty hot water cycle with a cup of white vinegar or a commercial washing machine cleaner.

Check the door seal for trapped dirt, lint, or moisture. Wipe it with a damp cloth and mild detergent, ensuring to remove mold or grime trapped in the folds.

Leave the door open after each use to allow the drum and seal to dry thoroughly. This helps prevent mold and mildew growth inside the machine.

Dryer Lint Filter and Ventilation Maintenance

Clean the lint filter after every drying cycle. Lint accumulation reduces airflow, leading to inefficient drying and potential fire hazards.

Inspect and clean the dryer vent and ductwork at least twice a year. Remove lint buildup using a vent brush or vacuum designed for dryer ducts.

Ensure the vent pipe is properly connected and venting outside. Blocked vents can cause overheating and strain the dryer’s motor.

Preventing Mold and Mildew Buildup

Keep laundry appliances dry when not in use. Moisture left inside creates an ideal environment for mold and mildew.

Use a deodorizing cleaner or wipe surfaces with a diluted bleach solution (1 cup bleach to 1 gallon water) once a month. Focus on seals, detergent dispensers, and drum interiors.

Leave appliance doors slightly ajar when idle to improve air circulation. Regular mold prevention minimizes the risk of odor and health issues in laundry appliances.

Extending the Lifespan of Small Appliances

Proper care involves specific storage methods and regular maintenance to prevent damage and maintain performance. Handling small appliances carefully and cleaning them thoroughly can significantly reduce wear and tear.

Safe Storage and Handling Tips

Store small appliances in dry, cool places to prevent moisture buildup, which can cause rust or electrical issues. Use original boxes or dust covers to shield appliances from dust and accidental damage.

Keep cords untangled and avoid wrapping them tightly around the appliance, as this can wear out the wiring. When moving appliances, always lift them by the base or designated handles rather than pulling on cords or fragile parts.

Avoid overloading outlets to reduce the risk of electrical faults. Label storage containers for accessories and keep instruction manuals nearby for reference.

Regular Descaling and Deep Cleaning

Descaling is crucial for appliances like coffee makers and kettles to remove mineral deposits from water. Use manufacturer-recommended descaling agents or a vinegar-water solution every 1-3 months, depending on usage and water hardness.

For deep cleaning, unplug appliances and disassemble removable parts. Wash these with warm, soapy water; dry thoroughly before reassembling to avoid mold.

Wipe down external surfaces with a damp cloth to remove dirt and grease. Avoid harsh abrasives that can damage finishes or seals. Regular cleaning prevents malfunctions and maintains appliance efficiency.

Seasonal Appliance Maintenance Checklist

Maintaining appliances requires adapting care routines to seasonal changes. Key steps involve protecting units from extreme weather and optimizing their efficiency during temperature shifts.

Preparing Appliances for Winter

Check all seals on refrigerators and freezers to prevent cold air leaks, which can increase energy usage. Clean coils behind these appliances to ensure proper heat exchange.

Insulate exposed pipes connected to water heaters and dishwashers to avoid freezing and potential bursts. For HVAC systems, replace filters and remove debris from outdoor units to maintain heating efficiency.

Unplug or drain outdoor appliances like garden fountains or pressure washers to prevent ice damage. Verify smoke and carbon monoxide detectors are functional, as winter increases indoor appliance use.

Summer Maintenance Precautions

Increase attention to air conditioning units by cleaning or replacing filters every month during heavy use. Clear vegetation and debris around outdoor condenser units to promote airflow.

Check dishwasher spray arms for mineral buildup, especially in areas with hard water, to maintain cleaning performance. Regularly defrost and clean the freezer to ensure it runs efficiently in warmer months.

Inspect refrigerator door seals to keep cool air inside, reducing compressor strain. Avoid placing heat-generating appliances in direct sunlight to prevent overheating and higher energy consumption.

When to Call a Professional for Repairs

Knowing when a problem requires expert attention can save time, money, and prevent further damage. Certain appliance issues involve complex mechanics or safety risks that are best handled by trained technicians.

Recognizing Advanced Mechanical Issues

If an appliance shows persistent, unusual noises, such as grinding or banging, internal components may be damaged. Frequent breakdowns, failure to start, or irregular operation can signal motor, compressor, or electronic control failures.

Problems like leaking refrigerant in refrigerators or a burning smell from a dryer motor indicate issues beyond basic maintenance. Attempting repairs on these could void warranties or cause more damage.

In these cases, professional diagnostics and repair ensure accurate identification and proper fixing of the root cause, avoiding costly trial-and-error attempts.

Safety Considerations and Warranties

Electrical malfunctions, gas leaks, or water damage risks require immediate professional intervention. Handling these risks without expertise can lead to injury, fire, or further appliance damage.

Before opening or modifying an appliance, check the warranty terms. Unauthorized repairs often void coverage, removing manufacturer support.

Professionals have the tools and knowledge to maintain safety standards and preserve warranties, especially when dealing with sealed systems, high-voltage parts, or gas connections.

Eco-Friendly Appliance Maintenance Practices

Maintaining appliances with environmental impact in mind requires practical adjustments. This involves managing energy use effectively and choosing cleaning methods that avoid harmful chemicals.

Reducing Energy Consumption

Energy-efficient maintenance starts with regular cleaning of appliance filters, vents, and coils. For example, refrigerator coils should be cleaned twice a year to prevent overworking the compressor, which saves electricity.

Using appliances during off-peak hours can also lower energy demand and costs. Adjusting settings to eco or low-power modes reduces energy usage without compromising performance.

Ensure that seals and gaskets on refrigerators and ovens are intact to maintain temperature efficiency. Replacing worn-out parts promptly prevents wasted energy caused by malfunctioning components.

Sustainable Cleaning Methods

Avoid chemical cleaners that contain harsh solvents or toxic ingredients. Instead, use a mixture of white vinegar and water to clean the surfaces of appliances like microwaves or washing machines effectively.

Microfiber cloths capture dust and grime without the need for chemicals, reducing waste and exposure to pollutants. Washing removable parts in warm, soapy water rather than using sprays keeps appliances clean with minimal environmental impact.

Regular maintenance with gentle, non-toxic products extends appliance life and decreases the need for replacements, reducing landfill waste.

Simple Home Decor Ideas on Budget for Stylish and Affordable Living Spaces

Refreshing your home decor doesn’t have to drain your wallet. Simple changes like rearranging furniture, adding plants, or updating textiles can make a noticeable difference without spending much. These ideas focus on using what you already have or affordable items to enhance your space. Budget-friendly home decor is about creativity and smart choices. Small upgrades such as DIY wall art or thrifted accessories can bring personality to any room, proving style doesn’t require expense.

Understanding how to mix functionality with aesthetics will help you create a comfortable environment. This guide offers practical tips to transform your home on a budget, making the process both accessible and effective.

Affordable Living Room Decor Ideas

Enhancing your living room doesn’t require a large budget. Strategic updates through textiles, creative wall decorations, and smart furniture placement can transform the space effectively.

Revamp with Budget-Friendly Throw Pillows and Blankets

Adding throw pillows and blankets is an easy way to refresh your living room. Look for affordable options in stores or online that offer a variety of colors and patterns.

Focus on mixing textures like velvet, knit, or linen to add depth. Choose 3-5 pillows of varying sizes rather than matching sets to create a casual, inviting feel.

Layer blankets on sofas or chairs in complementary tones. Seasonal colors or lightweight throws can also change the vibe without costing much.

DIY Wall Art Projects for a Personal Touch

Creating your own wall art adds character and saves money. Use materials like canvas, paper, or reclaimed wood to craft unique pieces.

Simple designs such as geometric shapes, abstract patterns, or framed fabric can suit many decor styles. Invest in a basic set of paints, markers, or stencils.

Photo collages or printed quotes framed in inexpensive frames from thrift stores are quick options. These projects allow total control over size and color, fitting your living room perfectly.

Thrifty Ways to Rearrange Furniture

Furniture rearrangement is a zero-cost method to refresh your space. Experiment with different layouts to improve flow and maximize natural light.

Try angling large pieces or placing seating around a focal point like a fireplace or TV. Clearing clutter and limiting the number of items in the room can also make it look larger.

Use rugs to define zones within the room, such as seating or reading areas. Moving furniture near windows can create cozy, well-lit spots for relaxation.

Low-Cost Kitchen Decorating Tips

Small changes can make a big impact without spending much. Using affordable materials, updating key features, and organizing essentials visibly all help refresh the kitchen space.

Creative Backsplash Upgrades Using Peel-and-Stick Tiles

Peel-and-stick tiles offer a quick way to update your backsplash with minimal effort and cost. They come in various styles, including subway tile, mosaic, and metallic finishes.

Installation requires no grout or special tools. Simply clean the wall, peel the backing, and apply. This makes it ideal for renters or those on a tight schedule.

Choose water-resistant and heat-proof tiles for durability. Patterns and colors can either blend with existing decor or add a bold statement.

Refresh Cabinet Hardware on a Budget

Replacing old cabinet knobs and pulls can instantly modernize the kitchen. Standard hardware sizes mean it’s easy to find affordable replacements at home improvement stores or online.

Metal finishes like brushed nickel or matte black are popular and versatile. Consider mixing shapes for a customized look.

Use a screwdriver and take care to measure before buying new handles to ensure a perfect fit. Budget options often come in sets of 10 or more, reducing cost per unit.

Inexpensive Ways to Display Kitchen Essentials

Open shelves or wall-mounted racks offer practical displays for commonly used items like spice jars, mugs, or cooking utensils. They increase storage and create visual interest.

Grouping similar items in uniform containers or baskets keeps the space neat. Labels improve both aesthetics and efficiency.

Repurpose everyday containers, such as mason jars or wooden crates, for a rustic touch. This approach saves money and personalizes the kitchen without clutter.

Bedroom Makeovers That Won’t Break the Bank

Transforming a bedroom on a budget involves creative choices with materials and lighting, plus smart reuse of existing furniture. Focusing on simple DIY projects, affordable light fixtures, and furniture repurposing can significantly change the room’s feel without large expenses.

DIY Headboards and Accent Walls

Creating a DIY headboard is an easy way to add personality without buying an expensive piece. Materials like reclaimed wood, fabric panels, or painted plywood work well and stay affordable. For a modern look, consider geometric patterns using paint or removable wallpaper.

Accent walls bring focus and texture. Peel-and-stick wallpaper or stencil designs are budget-friendly and easy to remove if you want to update later. Choose neutral or bold colors depending on the mood you want, but keep the rest of the room simple.

Budget Lighting Solutions for Cozy Ambiance

Lighting drastically affects bedroom warmth and style. String lights or LED strips are affordable and create soft, cozy illumination. Table lamps with inexpensive shades or secondhand floor lamps can add layers of light.

Swap out harsh overhead bulbs for warm-toned LED or incandescent bulbs for a softer glow. Adding dimmer switches or plug-in dimmable lamps increases control and atmosphere without costly rewiring.

Repurposing Furniture for a New Look

Instead of buying new pieces, give old furniture a new purpose. Paint dressers or nightstands in pastel or matte colors to refresh their appearance. Replacing knobs or handles with unique, budget-friendly hardware elevates their style.

Use wooden crates or pallets as shelves or bedside tables. Upholstering an old chair or creating storage under the bed with baskets maximizes function and style at low cost. These choices reduce waste and stretch your budget further.

Wallet-Friendly Bathroom Updates

Updating a bathroom doesn’t need to be costly. Small changes to mirrors, vanities, and storage can make a big impact without breaking the budget. Focus on items that add function and style with minimal investment.

Quick Mirror and Vanity Refreshes

Start by swapping out hardware like drawer pulls and faucet handles. Choose modern finishes such as matte black or brushed nickel for an updated look. Use peel-and-stick backsplash tiles or vinyl decals around the mirror for a fresh aesthetic that’s easy to remove.

Repaint the vanity with moisture-resistant paint in light shades like white or soft gray to brighten the space. Add a simple frame around a plain mirror to create a custom feel without replacing it entirely. Make sure to sand and prime surfaces for durability.

Affordable Storage Hacks for Small Spaces

Utilize vertical space by installing open shelves above the toilet or sink. Floating shelves in wood or metal are inexpensive and provide easy access to necessities. Use baskets or bins on these shelves to organize toiletries and towels neatly.

Over-the-door organizers work well for holding smaller items like hair tools or cleaning supplies. Magnetic strips inside cabinet doors can store metal objects such as nail clippers and tweezers. These methods increase storage without requiring major construction or hefty costs.

Seasonal Home Decor on a Budget

Updating home decor with the changing seasons doesn’t require spending a lot. You can shift styles by repurposing what you already own or by adding affordable accents. Simple swaps and creative handmade items refresh your space efficiently.

Transitioning Decor for Different Seasons

Focus on neutral base pieces like throw pillows, rugs, and curtains. These create a versatile backdrop that works year-round.

Change small accents to reflect the season—swap pillow covers, add a seasonal table runner, or switch out candles. For example, use warm-toned cushions and plaid throws in fall, then bring in lighter linens and pastel shades for spring.

Plants are an affordable way to add seasonal flair. Swap out heavy greenery in winter for flowering plants in spring or small potted succulents in summer.

DIY Decorations Using Everyday Items

Many household items can be repurposed into attractive decor. Mason jars become vases or candle holders with minimal effort.

Create wreaths using twigs, dried flowers, or even fabric strips. Use pinecones collected outdoors as natural table decor in autumn and winter.

Paper crafts also offer inexpensive options. Cut colorful paper into simple shapes like leaves or snowflakes and hang them on string for garlands.

Quick DIY Ideas:

Item Use
Mason jars Vases, candle holders
Twigs and pinecones Wreaths, centerpieces
Paper Garlands, window decorations

These approaches keep seasonal decorating affordable and creative.

Eco-Friendly and Budget-Smart Decor Choices

Choosing decor that is both environmentally responsible and affordable involves selecting materials with a low environmental impact and creatively reusing what you already have. These methods help reduce waste and save money without sacrificing style.

Sustainable Decorating Materials

Using materials like bamboo, cork, and reclaimed wood can enhance your space with natural textures while minimizing environmental harm. Bamboo grows quickly, making it a renewable resource ideal for furniture and flooring. Cork is lightweight, durable, and resistant to moisture, functioning well in wall tiles and coasters.

Recycled glass and metal are also great options for decorative accents, offering unique aesthetics and durability. When buying textiles, opt for organic cotton or linen, which avoid harmful pesticides and often last longer.

Material Benefits Uses
Bamboo Fast-growing, renewable Furniture, flooring
Cork Moisture-resistant, lightweight Wall tiles, coasters
Recycled Glass Eco-friendly, durable Vases, tabletop decor
Organic Cotton Less chemical use, durable Curtains, cushions

Upcycling and Repurposing Household Items

Turning old objects into new decor pieces is cost-effective and reduces waste. For example, glass jars can be cleaned and used as candle holders, flower vases, or storage containers. Wooden crates can be sanded and stacked to create shelves or nightstands.

Fabric scraps from worn-out clothes can be sewn into patchwork pillows or wall hangings. Even old books can be stacked to serve as side tables or transformed into art by cutting shapes into pages.

Key tools for upcycling include sandpaper, paint, and basic sewing supplies. This approach often requires minimal investment but adds personalized charm to your home.

Final Thoughts on Styling Your Home for Less

Budget-friendly home decor is achievable with intentional choices and creativity. Focus on repurposing what you already own instead of buying new items. Small changes, like swapping throw pillow covers or updating lampshades, can refresh a space without significant cost.

Key strategies include:

  • Shopping at thrift stores or flea markets
  • Using DIY projects to personalize items
  • Prioritizing multi-functional decor pieces

Keep in mind, functionality and style don’t have to conflict. Simple organization tools like baskets or shelves improve both look and utility.

Plan your purchases carefully. Set a budget and avoid impulse buys by making a list of needed items.

A well-styled home is built over time; layering your decor gradually can prevent overspending. Use color consistency and balanced placement to create cohesion without new furniture.

Remember:

Tip Benefit
DIY Upcycling Saves money and adds uniqueness
Thrift Shopping Affordable and diverse finds
Decluttering Frees space and improves aesthetics

By combining these approaches, home styling becomes manageable and cost-effective.

A Homeowner’s Guide to Transitioning Your Property from Winter to Summer

A Homeowner’s Guide to Transitioning Your Property from Winter to Summer

Around 48% of energy use in a typical home goes to heating and cooling. That fact alone should change your perspective on the seasons changing from cold to warm. It’s not a chore. It’s a business decision. The systems you need to cool your home in the warmer months work a lot harder than the systems needed to heat your home in the colder months. And a system that’s been dormant for the season will operate at a fraction of its potential, driving up costs over time, invisibly, until it gives out when you need it most.

The point of spring maintenance tasks around the house isn’t to do them for the sake of doing them; it’s to discover issues while you still have time to fix them for cheap.

Start With A Controlled System Stress Test

Ahead of the summer months, you should fire your cooling system up for about 20 minutes. Do this on a mild day – not a scorching one. You want to stress-test the system under manageable conditions so any unusual noises, weak airflow, or strange odors are easy to identify without the pressure of an actual heatwave driving decisions.

Listen for rattling in the ducts, which can indicate loose sections or debris inside. Pay attention to whether cool air reaches every room at a similar rate. If one room is consistently warmer, that’s a duct integrity problem – gaps or separations in the distribution system that let conditioned air escape before it arrives.

This is the time to catch problems. Emergency HVAC calls during peak summer heat come with premium pricing, longer wait times, and sometimes temporary fixes because parts are backordered. A 20-minute test run in spring costs you nothing.

Clear The Condenser and Flush The Drain Line

The outdoor unit works hard in summer, then spends winter surrounded by leaf litter, seed pods, and compacted debris. Lend a hand by clearing everything within a meter of the unit. And while you’re there, make sure nothing is leaning against fins. They’re fragile: a dozen or so can be gently bent back into shape, but a block of wood caught in there can puncture refrigerant lines and lead to a costly repair. A unit that can’t dissipate heat efficiently prompts the compressor to work harder. That’s a double hit on your wallet: compressors suck energy and are the most expensive part to replace.

Ducted air conditioning creates water. That cooling process dehumidifies, so drains can back up and overflow. That means wet carpets or floorboards. It takes five minutes to snake the condensate drain line. Unscrew the cap, flush it with a mix of water and white vinegar, then turn the system on and listen for a satisfying glugging as the water level drops.

Checking refrigerant pressure, inspecting internal coils, and testing that electrical connections are clean and tight are all jobs for a licensed tech. Servicing ducted air conditioning before peak season is one of those maintenance items worth booking in advance rather than reacting to a failure mid-summer.

Seal The Thermal Envelope Before Heat Builds

Your home’s thermal envelope – walls, windows, the attic hatch, and any penetrations where plumbing or wiring enters the conditioned space – is where summer fails happen quietly. Hot, high-pressure outdoor air finds every gap and pushes into living areas, making your cooling system work constantly just to maintain temperature.

Check weatherstripping around exterior doors. If you can see daylight around a closed door frame, cool air is bleeding out every time the system runs. Replace worn strips before summer starts, not after you’ve noticed your electricity bill climbing.

Attic penetrations are the most overlooked entry point. The hatch itself is often uninsulated, and utility penetrations – pipes, wires, ducts passing through – create gaps that let attic heat radiate directly downward. Sealing these with expanding foam or caulk and adding a layer of insulation to the attic hatch takes an afternoon and meaningfully reduces how hard your cooling system works throughout the season.

While you’re in the attic, check the insulation depth. If you can see the top of the ceiling joists, you’re running below the R-value needed to resist summer heat transfer effectively. Adding bulk insulation is one of the higher-return upgrades a homeowner can make before summer.

Filters and Thermostat Settings

Change your air filters in advance of continuous cooling, and opt for the highest Minimum Efficiency Reporting Value (MERV) your system recommends or can accommodate. MERV filtration ratings measure filter performance and higher ratings trap finer particles. This becomes more important in the spring because both pollen and overall dust loads are particularly high.

A clogged or incorrectly sized filter will restrict airflow, for one. That’s a problem of inefficiency. But it also puts damaging strain on the air handler, and during its cooling function, the evaporator coil.

If you’re still using a manual thermostat, a programmable or smart model pays for itself quickly by reducing cooling during hours when the house is empty. Setting higher temperatures during peak grid hours and pre-cooling before they hit is a simple scheduling decision that compounds over a full summer.

The transition window is short. Systems that get attention in spring run better, last longer, and cost less to operate when the heat actually arrives.